Category Archives: Green Living
More on the floor
When I tell you that I’m going to share one of my favorite customized floor sources with you today, does that immediately make you think of a very expensive price tag? Well then, you’re in for a nice surprise because this floor product is customized at very reasonable price. We’re talking about carpet tiles.
Now, let’s clarify something before we go any further. If “carpet tiles” makes you think of industrial grey or blue thin squares of carpet in an office lit with fluorescent lights, that is not what we’re talking about today. We’re talking a about an area rug or wall-to-wall carpet that you customize to fit your size needs and style desires. Take a look at a few examples:


These are not the dingy, generic office carpets that used to define carpet tiles. These are all the products of a fabulous company called FLOR. And right now, they are having a great sale going on to make designing your own carpet or rug even more affordable.
Creative Designs
You may have heard of FLOR before on design tv shows or in magazine ads. They are the new darlings of affordable, customized rugs for your home. And you can certainly see why with this kind of style.

For the price of a regular area rug or carpet padding and carpet, you can afford a very functional and elegant floor covering.

With FLOR tiles, you can customize the rug to the exact size you need in your room, without paying a traditional custom rug size cost.

They also have a great selection of original shapes, colors, and textures. FLOR also offers berber and wool carpet tile models…

…as well as original forms you can assemble and/or cut to your own tastes and interests.


I’m not getting paid or perked to talk about this great company. I only talk about companies that I really like and you can read more about that right here. I love FLOR because it helps my clients put more personality into their homes without breaking their budgets.
How It Works
You choose the size of rug you need in the style of tiles of your choice.

FLOR gives you lots of details about each rug tile model, including the depth of the face fibers so you can plan your rug to meet your traffic needs.

When your tiles arrive, you use their dots to secure the tiles to the floor.

Align each tile onto the dots…

…and little by little, your rug takes shape, right where you want it. Easy vacuuming, no extra rug padding needed and your rug stays in place.
You can also design your own rug layout, using multiple styles, textures, and colors of tiles…


…and by using their user-friendly online customizing tools.

Practical Solutions
I like FLOR tiles because their designs offer some realistic solutions to common household carpet problems. Have you ever been seated at a dining table and struggled to move your chair because the rug was so thick or just got bunched up? That is not a problem with FLOR:

Have you ever had a nasty stain on a carpet that you could never get rid of, no matter how hard you cleaned it? You have probably tried to move a piece of furniture over the stain or replaced the rug outright. Wine, pasta sauce, grape juice, etc. can be every rug’s nemesis. With FLOR, you just replace one or two stained tiles and move on with your life.

A bathroom rug you don’t have to throw into the washing machine or line dry? Vacuuming has never sounded so good:

Did I mention that FLOR is striving for full sustainability? They have a Return & Recycle program that encourages customers to send in their old FLOR tiles so that none of their carpet tiles end up in landfills. You can read more about their ongoing eco-friendly progress right here.

You can see the full line of FLOR products on their great website, which supplied all of the pictures for this post. While you’re on their website, you also can sign up for a catalog to make sure you see all of their newest designs.
Do you like the idea of using beautiful carpet tiles in your home? In what part of your home would you put a new rug or carpet? See a pattern or color you love in this post. Share your carpet cravings in a comment!
Waterworld
Adam’s ale, voda, amanzi, nero, agua, wai, l’eau, shouei, das wasser, el-ma, ama.
We all need these words in our lives, no matter where we live in the world. They represent one of the most important elements in our lives.

Image courtesy of coolcalifornia.org
H20.
It may be our most universal connection to other cultures. Sadly, we may all also be ruining our shared planet with it. That looks a little something like this:

Image courtesy of cleanwaterflorida.com
Problem
This problem may not seem like big news to you, but when you look at the numbers…it certainly bears repeating. Bottled water is a $50-100 billion per year industry. It is handy to have water right when you need it. Plus it makes you feel healthier when you drink it. Nobody gets this better than the bottled water companies.
So you’ve drunk your water and you are feeling good about yourself. What do you do with that empty bottle. Do you recycle it? Odds are, you don’t. Studies tell us that only around 30% of people recycle their plastic water bottles.
The other 70% of people just toss their water bottles in the garbage, which creates 1.4 million tons of trash every year. (And we’re not talking about the estimated 47 million gallons of oil needed to make those bottles to begin with.) Feeling a little less healthy now, isn’t it?

Image courtesy of planetgreen.discovery.com
And this isn’t just hurting the planet, either. It is killing household budgets. If the average single-serving water bottle costs between $1.50 – $2.00, roughly three of those bottles equal a gallon of water. You are spending $6 a gallon on water…that you already pay a separate water bill for at your home. Think about that the next time you complain about gasoline prices…
Solutions
If you feel you have no other choice but to use store-bought water, please try to buy bottles that can be recycled (and not all of them can be). It is estimated that the energy conserved from recycling a single plastic bottle can light a 60-watt light bulb for six hours.
A more affordable solution is a re-useable water bottle. There are so many options out there today that you can choose between many style and price options to fit your budget. One of the most popular styles today are these types of aluminum water bottles:

5 pack of aluminum water bottles, with fridge stand, for only $22 on Amazon. Just click the picture for the link!
Although, you can find many healthy plastic re-usable water bottles on the market, too. Some people prefer these to be able to see into their water level easier. Just be sure to avoid any re-usable plastic bottle that does’t read “BPA-free”. If we are trying to be healthy, why add more health risks with our water bottles?
Many people choose store-bottled water because they don’t like the taste of their tap water. An easy and cheap solution to this is a water pitcher with a carbon filter, like this one from Brita:

"Brita Slim Pitcher" for only $15 on Amazon. Click the picture to link to the item!
I like to recommend these to all my clients for a reason beyond taste and handiness. It has been suggested that people who don’t ever drink their tap water (a whopping 28% of Americans, by some estimates) tend to be less concerned with funding the infrastructures that provide good water to our homes. The thinking for this goes: “If you ignore a drinking water problem in your own home, you’ll hardly choose to upgrade it for everyone with your vote and tax dollars.” Something to think about, isn’t it?
Do you use a re-useable water bottle or water filter pitcher? They make great Christmas gifts and keep on giving back to the planet all year round. What do you use as a good drinking water solution in your home? Leave a comment and share your solutions. Also, stay tuned for a related free giveaway coming next week!
Want to see more Greener Living ideas? You can see more right here!
Geek check: The words at the top of the post are the base words for water in English slang, Croatian, Zulu, Greek, Spanish, Hawaiian, French, Chinese, German, Arabic and Cherokee.Accidents happen…
…especially if you have pets.
I am a big fan of pets. Huge! My local ASPCA uses the lovely phrase, “Discover the warmth of a cold nose.” and I couldn’t agree more. I talked about great online pet supply sources clients have recommended in a post last week. Today, I’m back with a tip I give my clients for handling a common household issue that comes with our furry family members.

Image courtesy of p49gar.com
Awwwww! Happy animals make me smile! If only they could talk in a language I could understand. Okay. Back to my point…
If you have four-legged pets, you may be familiar with the household issue I was referring to. It looks a little bit like this:

Yep.
As an interior designer, these types of pet stains cause the same kind of unhappy surprise and general need to yell that they do when you find them in your home. (Which is hopefully not while you are in your bare feet. Been there.)
I have a solution for you. This solution works for…well…let’s call them “upset tummy” accidents, “liquid” accidents and “solid” accidents. You know what I mean. And don’t worry. I’m not showing any pictures of the two most icky types of accidents in this post. Use your own imagination or experience.
There are two issues that we need to solve in the clean up of this situation. It only takes two steps, but the second one is almost always forgotten:
The Stain
This is the most obvious problem to solve. I hardly need to tell you to clean up the “solids” first. If you need to soak some of the solids out off a carpeted surface, use water to loosen them. Do Not rub a carpet to get a stain out. Just keep flushing the surface until all the solids have been removed.
If you are dealing with a liquid stain, first blot the surface with a paper towel. To do this:
- Place a large wad of paper towels over the stain then press down on the paper towels with the palm of your hand.

- Keep pressing in different places on the paper towel to make sure you cover the whole stain’s area. Your paper towel will soak through, just keep replacing it until there is no more liquid to soak up.

The Smell
This is often the skipped step in dealing with ALL pet stains and it makes a big difference. Whether you are dealing with a solid or a liquid stain, you should never skip this step.
It is important to remember that our pets’ sense of smell is multiple times more powerful than our human sense of smell. Ridding our homes of the smell for us is not the same as ridding the stain’s smell for our pets. More importantly, if our pets can still smell where a stain was, they often take it as a sign of the right place to…leave a stain…again.
To battle this risk, this is our secret weapon:

White vinegar, which has no color, is a green cleaning solution that many people already keep in the house. It can be used on solid and carpeted surfaces. (Although, if you are worried about rug/carpet discoloration, you can always try this solution in a discreet corner of the rug.) Vinegar is cheap and a wonder at getting out smells.
Here’s how to use it against pet stain smells:
- Pour one half cup of white vinegar into a 1 cup measuring cup.

- Fill the rest of the measuring cup with room temperature water from the faucet.

- Pour the water/vinegar mixture over the stain and let it sit for 30 seconds. Then blot all of the liquid up with paper towels, just like you did with the original stain.
- Allow the stain to air dry.
Easy, right? You can even teach children to use this technique. I learned how to do this when I got my puppy as a little girl. It’s a great way to teach pet owner responsibility and you can relax in the knowledge that the cleaning agent is non-toxic to your kids, your pet or your floors.
If you like this tip, you’ll love the “pet vs. furniture” tip I’m writing for a post next week! Be sure to check back! If you have a question about solving other furnishing stains/accidents, leave a comment below. How can I help you solve a troubled “spot” in your home? (Had to use that pun somewhere, sorry!)
Re-booking your travel
We talked last week about great uses for old maps as an art idea for your home. (You can read that original post right here.) Today, I’m going to show you a step-by-step guide for using your old maps to dress up the book shelves in your home.
I have used and taught this D-I-Y technique with several clients. I love it because it helps cut down on household clutter and the supplies are probably already in your home…making this project (potentially) FREE.
Intrigued?
Let’s start with this problem:

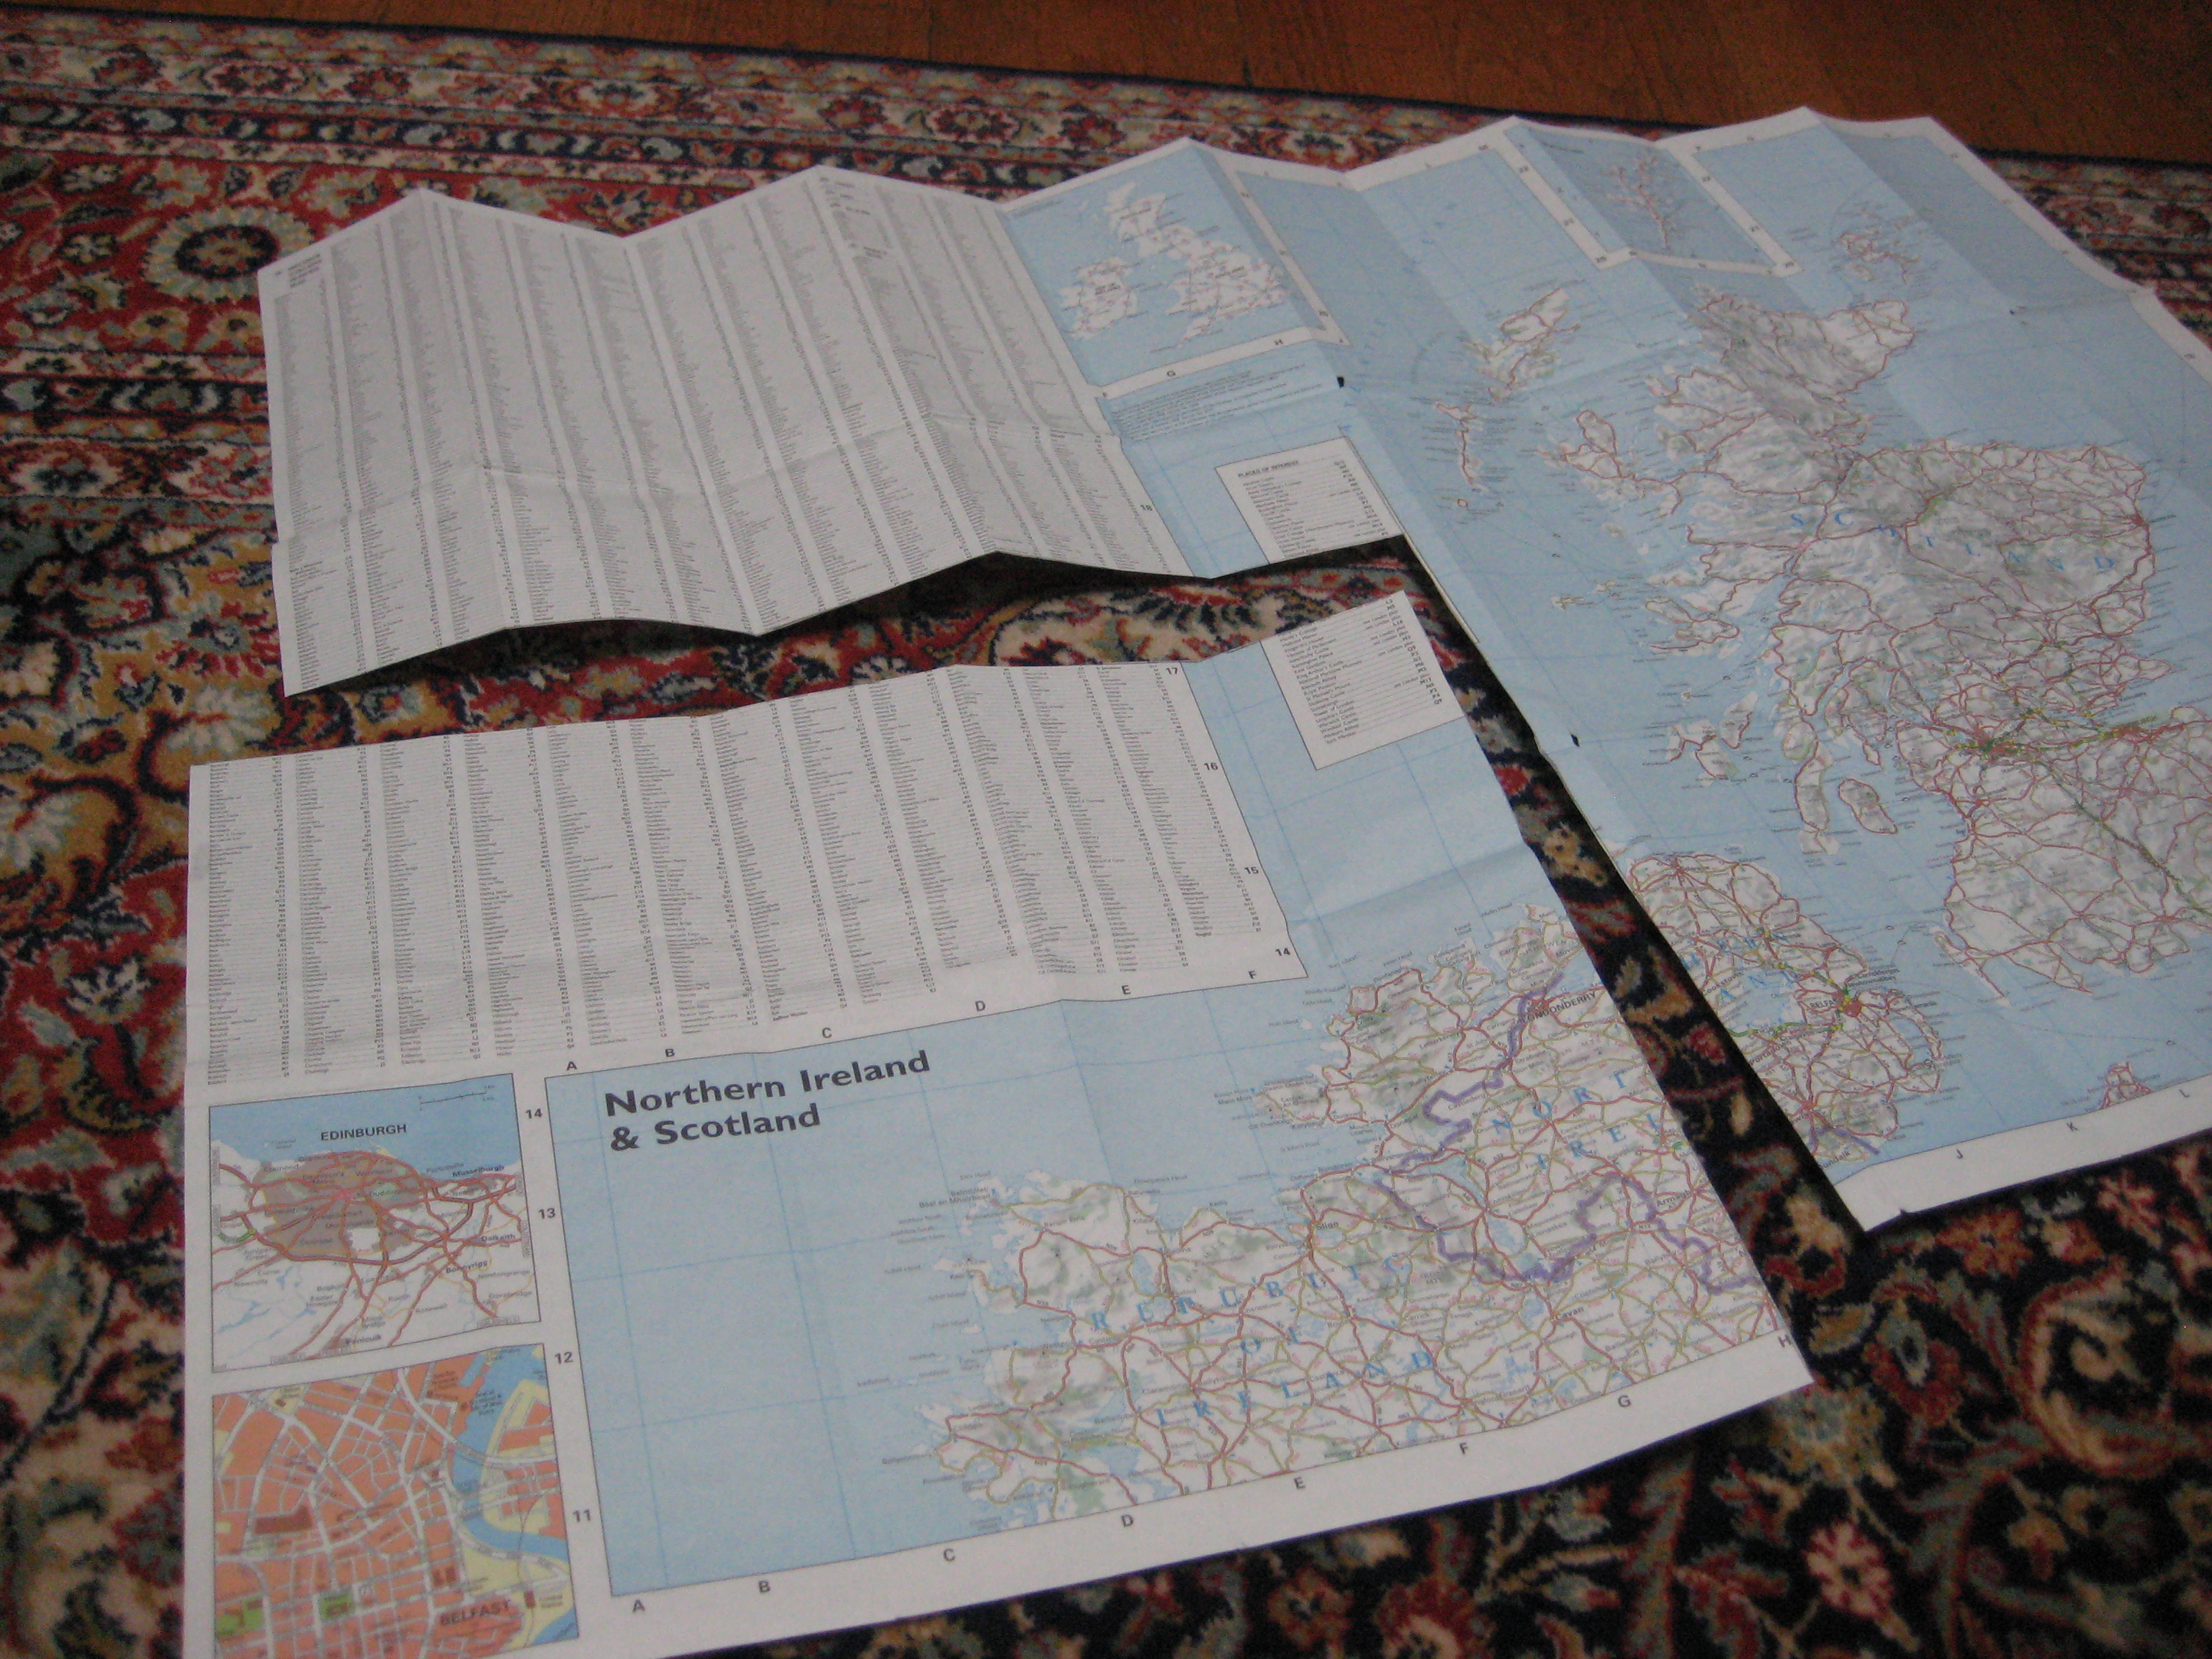
Guide books. Very useful, but what do you do with them when you are back home? Do you put them up on your bookshelf as a great memory? Do you put them on your book shelves with plans to re-use them on your next trip to that destination? Or do you save them to recommend favorite places to friends? Most people do one, if not all of these things. Those are some of my guide books in the picture, so I’m in the “most people” demographic, too.
Most people also have a lot of paper maps left over from their travels. Some of them have matching area guide books, some of them don’t. We’re going to use the old maps to carefully cover our guide books and make them look more interesting and sophisticated on our books shelves. Here are the supplies you’ll need and which you probably already have:
- Guide books (any size)
- Paper maps (which don’t have to match the guide book locales)
- Pencil
- Ruler and/or yard stick
- Paper folder (totally optional, but handy)
For the purposes of this little tutorial, I’m going to use a guide book and a map that cover the same area of the world:

You can use any paper map on any book, though, including maps that don’t match the guide book or even non-guide books. But I use this technique mostly for guide books, since you can use the maps to identify the book’s subject matter easily after it’s flashy, colorful spine is covered. Let’s get started…
First, open up your map and decide what area of the map you want to be the front cover of your book. I always avoid the map legend and start with a corner edge because that means two sides of our book cover are already cut evenly.

I want the map of England to cover the front of my Great Britain guide book, which takes up most of the bottom right corner of the map. But I will have to measure and mark the map before cutting it out to the right size of paper. So, I’ll flip the bottom right corner over…

…and will now do my measuring and marking on the “back” side of my desired cover image.
Next, I need to measure my book and adjust those measurements onto the map for cutting.

The height of my book is 8 3/4 inches long. However, I will need extra length on the map cover so I can fold over the paper at the top and the bottom, making a sturdy edge. So, I add 2 1/2 inches to both sides of my 8 3/4 inch book height and…

…mark the edge of the map at 13 3/4 inches.
Now I need the total width of the book, so I open the book up and measure the two sides and spine as a total measurement. Can’t forget the width of the spine!

This measurement comes out to be 11 1/4 inches, but again, we want a sturdy edge on this part of the book cover so I add 6 inches to the total measurement, knowing that 3 inches of map will fold over the book cover on each side.
I also add an extra 1/2 inch to the total measurement, because a book spine is designed to flex and my map cover need to move with it. The extra 1/2 inch will give it the flexibility it needs. If my “guess-stimate” of 1/2 inch of give is incorrect, I still have plenty of extra map on the edge of the width to adjust it later.

This brings the total width measurement to 17 3/4 inches, which I use my yard stick to measure and mark onto the bottom of the map.
The next step is very easy. Just don’t push to hard on your pencil or you can tear old, well-worn maps! I draw a straight line up from the bottom map marking….

…and a straight line out from my marking at the side of the map…

…until they connect and make a box.

These are the only measurements and markings you have to make when you start your book cover using two sides of an already-perfectly-square map. It makes it easier and it can make it faster if you are making a lot of book covers.
I double check my measurement box by making sure make sure my book centers nicely in the markings…

…which it does, so I cut out the box I’ve marked out of the larger map.

Always “measure twice cut and once” in any D-I-Y project to save yourself a headache. Here is what I’m left with…
…a perfectly sized paper cover to fit my guidebook.
Now we can channel out inner middle-school self and fold the paper to cover the book. I’m going to show you how to do this, in case you have forgotten or are reading this from a place where children don’t have to cover their school books to protect them -lucky you!-.
First, we place our guide book face up and centered on the paper, since we want the reverse side of the left side of the map to be our cover. Then we fold up the bottom of the map 2 1/2 inches and make a crease where it meets the book.

Extend the crease to make a full fold, from edge to edge along the bottm edge of the map.

Then press the crease to make it very sharp and defined. Geek alert: I’m using the edge of a Martha Stewart paper folder tool in the picture below, but the edge of your ruler works just as well, just don’t tell Martha…

Now repeat the exact same steps that you completed for the bottom fold at the top of the map: 
- Line up the book flush with the newly-folded bottom edge of the map
- Fold the paper down from the map top to meet the book
- Make a crease
- Extend the crease to a fold along the total width of the paper
- Sharpen the fold using your ruler
When you are done the total height of the folded map should exactly match the total height of the book’s spine.

Next, we fold in the two covers. Starting with the back cover of the book, for a good reason, we fold the right side of the paper over about 3 inches and slide the back cover of the book into the “sleeve” created but the map folding we’ve already done:


DO NOT use the ruler to sharpen the crease of this fold yet! We may need to adjust the paper after we fold the front cover.
Now we fold on the front cover, just like the back cover:

Here is where we test the 1/2 inch of extra paper we allowed for the spine flexing. Does the book close easily with the new cover on it?

No. The map paper cover is too taut.
So we go back to the back cover of the book and fold the back paper cover to be shorter, meaning a little less than our original 3 inch measurement.

We take the extra “give” from the back cover measurement because the back cover of the book is opened less and gets less wear. The front cover of any book is always opened, so we want a secure paper cover on that side of the book.
Now we try folding the front cover of the book closed again to see if it closes easily…

Success! Now look at the very front cover of the book. Do you like how the map lines up as a paper cover? If yes, now you can go back a sharply crease the front and back cover paper fold with your ruler.

You’re done!

This is a great project to include kids on, especially if they are already pros at wrapping their own school books! Plus, getting them into the mindset of cleaning out and repurposing items as you de-clutter helps get them into healthy habits for cleaning their own rooms. (Hmmmm…this post has turned out to be a Greener Living post, too.)

Another tip: Many people have laminated or plastic covered maps, like mine below:

However, if you have one of these cards in your wallet…

…your membership dues mean you get paper maps like these for FREE:

See? This is such an affordable project!
Here’s all of the guide books as we first saw them at the top of the post:

And here they are stylishly covered in your old maps:

Don’t they look so much more interesting, yet pulled together? Here they are looking much more chic in their covers on a book shelf:

Think you can do it? Time to clean out all those old maps that have been lounging in your car’s glove compartment! You can find another great idea for them in this post.
How many maps do you have lying around in your home? Can you offer to take unused maps from your family and friends to help them clean out and keep your project free? How many books will you cover using this project? Leave a comment!
Read all about it
Do you read the newspaper? According to the EPA, the United States publishes 24 billion newspapers a year. That is a lot of paper printed every year!
I know we all now know enough about our ecological crisis to recycle those newspapers. There really is no excuse not to anymore. But, what if you could get more from your paper after you’ve read it, but before you recycle it?
You’ve paid for your newspapers and the trees used to make the paper have already been processed. Why not make these newspapers do more during their “lifetime” which could help cut down on other wasteful products later?
I love finding new or new-to-us ways for us all to be more green in our homes. (You can read all about my Greener Living series right here.) So without further ado, I give you…

Image courtesy of earth911.com
7 Tips to Give Your Newspaper a Workout
- Clean your glass. This is an old housewife trick for really clean mirrors, windows, chandeliers, etc. You can use any cleaner you like, although I always recommend a earth-friendly one, like this one. (You know how I hate to use paper towels if there is another way!)
- Ripen your tomatoes. Gently wrap not-quite-ripened tomatoes in a sheet or two of newspaper and let them sit in a cool, dark place, like your pantry, for a day or two. Your tomatoes will come out of the paper more ripe and easy to slice.

Image courtesy of realsimple.com
- Freshen-up your boots. Newspaper is a great odor absorbent paper. Stuff a roll of newspaper into your boots or sneakers and they’ll smell fresher the next time you need them. This trick also works for coolers!

- Pack a box. Shred your old newspapers and use them as safe packing material when you need to mail a box. The box recipient can re-use your box-filler or recycle it themselves. You’ll save money on bubble paper and help keep it out of the landfills.
- Wrap a gift. Cartoons for kid’s parties, sport pages for sports fans (father’s day, birthdays, etc.), business pages for graduation gifts, the combinations are endless. Planet-friendly wrapping that celebrate the gift recipient’s interests is thoughtful on many levels.

Image courtesy of wanderingmist.com

- Make a homemade craft table. Cover your kitchen table with several layers of newspaper and secure it with a good painter’s tape. Your will table be protected from scratches and spills, perfect for crafts projects for all ages. Clean up means rolling your “tablecloth” right in to your recycle bin. Use this for messy picnic table meals outside, too!
- Clean your grill. Soak layers of newspaper in clean water and then lay the papers out flat over a still-warm grill. Close the grill lid and leave it for up to two hours. The steam of the warm, wet papers will loosen the grime off your grill.
Best of all…MOST important of all…all of these tips allow you to dispose of your now-more-well-used right into your recycling bin. No more lazy Sunday newspapers just lying around on the floor by the sofa at your house! They need to get to work!
Can you use these pre-recycling ideas in your home? Do you have other great tips for using old newspapers around the house? Does anyone ever see any “paper drives” as fundraisers anymore? Leave a comment and share!
In the bag: giveaway winner!
It’s time to announce this week’s giveaway winner!
This week’s giveaway is a set of great re-useable shopping bags. Seven of the bags are large grocery-style bags and 5 of the bags are designed for carrying produce home safely from the store or market. All of the bags are designed to eliminate the use of “disposable” plastic grocery bags as a part of my ongoing Greener Living challenge and post series.

And the winner is…Tara L.!
Tara estimates she makes 3-4 trips to the grocery store every week and feels like she is always running out for more milk. These bags will definitely have your back for hauling milk! Congratulations, Tara! I’ll be contacting you soon via email to get your mailing address.
If you didn’t win this week, take heart! There is another giveaway coming in just two weeks. Have a great idea for a giveaway? Leave a comment below with your idea. I’m always on the lookout for great gift ideas for my readers and I’d love to know what you like!
In the bag: free giveaway
*******This contest is now closed, although you should still read this post for great shopping tips!*******
Whew!
I am finally catching up! Who knew a silly little finger injury could cause so much of a work back up?! I have finally gotten myself organized and am now getting caught up on blog posts. I really love talking with you all and sharing ideas, so please allow me to restart my Fall with a great giveaway!
Since I’ve been doing some work and home re-organizing, I’ve decided to assemble this giveaway with a type of item we use in our home: re-useable grocery bags. If you are still using the Earth-unfriendly bags the grocery store gives you, here is an easy leap to Greener Living.
However, if you already have re-usable grocery bags, know that I’m stepping it up a notch and choosing the best of those bags out there that can be used in many other ways, too. This is a great set to complement what you are already using. I figure if the goal is to buy theses bags once, we should buy them to use well and save money and time beyond the grocery store.
We keep all of our re-usable bags in the trunk of our car, so we can’t forget them. I use every one of these bags in my home and work and now this awesome set can be yours:
How could you ever want to use brown paper bags…and trees…when you can carry these beauties around? True story: I gave my mom (who lives several states away – Hi Mom!) a set of these several years ago and people still stop her to ask her where she got her pretty shopping bags. Feeling like a fashionista while wrestling milk and toilet paper into the trunk of your car…priceless.
Speaking of milk, let’s start with Mr. CARO’s favorite set of bags. The gorgeous nature photographs of these bags were sent in by customers of a now-out-of-business grocery store in a greener shopping bag design contest.

There is a different image on each side of every bag. So pretty and a great reminder of what we are all trying to protect. Best of all these bags are sturdy and deep enough to hold two gallons of milk each. Whenever they get dirty, we just give these bags a good wipe-down, inside and out (using this planet-friendly product) and they are ready for more heavy lifting.

Mr. CARO also wants me to mention that these bags each come with two strong sets of handles. You can use the shorter handles to carry the bag in your hand and the longer handles are long enough to go over your shoulder. (Mr. CARO’s current grocery lifting record is two bags with four gallons of milk over his shoulders with two full and heavy bags of canned good in his hands…up two and a half flights of stairs.)
Also, at an outdoor concert/picnic event, these bags saved our entire group of friends from having that icky damp grass feeling on the seats of our jeans. Let’s see you do that, brown paper bags.
Next is a set of bags I use in my work. These two deep bags open up to be 8 inches wide and zip fully closed. If any of my clients are reading, this is how I safely carried your re-framed family photos back into your home without letting them get wet from rain, snow or mud splashes. If you are a parent of a child that plays sports these might be an ideal help-mate for you, too. Check them out:

Again, wipe them down to clean them and they are ready for more work.
The next bag is a stylish reminder of the Greener Living goals we are working toward, but it also gives you a wider shape to carry wider shaped objects.

I use this bag as a great library bag because my work often requires research in the form a big coffee-table-sized book. Anyone who has ever tried to neatly stack those large picture books for kids also knows what I mean.
Finally, this fab giveaway includes my very favorite set of bags. I love these bags because they helped me re-think a habit I wasn’t even conscience of in my daily life. I have used recycled grocery bags for years and given pretty ones as gifts, but I had never even blinked at this other problem I was contributing to every time I went shopping.
This is what I buy in the produce section pretty regularly:

We try to buy the most local produce whenever we can. We also try to buy organic produce where it counts. The potatoes and apples are organic, but the bananas are not, because we don’t eat the banana peel. We buy our popcorn in bulk (read our healthy cooking method here) and buy we the organic popcorn because we are eating most of the kernels.
So by the time I pay for my produce, I’ve carefully considered our household grocery budget, helping local farmers, saving food transport costs, and, most importantly, choosing healthy food for our bodies. Then I bring it all home and put it all away to be used in yummy recipes and I’m left with this:

Aren’t I just the model of conscientiousness?
Have you ever really looked at your grocery store produce bags? Mine have a choking hazard warning on them. Which is good, because I’ve probably been choking a lot of landfills in several states with them.
Next time you are in your grocery store, ask the produce manager how often they have to refill the big rolls of plastic bags we have all used. You’ll be surprised at how frequent those refills are needed. Then, picture all of those little sheets of plastic that we disseminate out to our homes, our communities and our environment. Where do they all go?
Is this thought as much as an eye-opener for you as it was for me? Well, I have a solution to stop this crazy wastefulness. Here’s where these come in:

These are fine mesh produce bags from Crate & Barrel. I looked around at all the fabric produce bags out there and these are the best I’ve found. They neatly draw-string close to turn my irresponsible plastic bag of apples into this:

You can still read the product price code sticker through the bag up close, which keeps your checkout time simplified. The mesh is also a tight enough weave that it can safely carry your bulk purchase items, like our popcorn:

And…if you occasionally squish a grape in your bag on the way home, these 100% polyester bags pop right in the washing machine and air dry quickly.
Now, just in case you’re wondering, I’m never paid or perked to promote a product for any company. I really use these and I like to share real Green Living solutions to help us all work toward better planet living. It’s the only planet we have, ya know?
So, how can you bring all of these helpful, pretty bags into your home and make a difference every time you shop?

I’m glad you asked…
To Enter: Leave a comment that begins with “IN THE BAG” and tell me how many grocery store trips you make in a month. Just estimate if you don’t know exactly. Think about how all these nice shopping bags could help make your errands easier!
Enter By: Monday, September 19, 2011 at 10pm EST
Number of winners: Only 1, so enter now! Only one entry per email address will be allowed, so that everyone gets a fair chance of winning. I’ll ship this giveaway to anywhere in the world, so international entries are welcome!
The Winner: Will be selected at random from the total number of comments by using random.org and will be announced in a post next Tuesday.
Already have shopping bags you re-use? Win these for a friend and help them join in on Greener Living.
Please share this post with your friends, so we can all take steps to cut back on our plastic produce bag intake. A win for the planet is a win for all of us!
Like shooting cash in a barrel
Been hot enough for ya?
Isn’t it a sad sign of our times that I can write that sentence and know that I am speaking to everyone in America? I can also safely say that if you maintain a garden or lawn, the only number higher than our recent temperatures may be on your water bill.
All the more reason for today’s Greener Living post, because we’re talking about rain barrels.

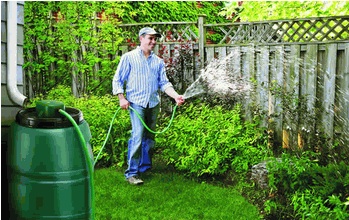
Image courtesy of Better Homes and Gardens
Definition
A rain barrel is defined as any water tight container that can catch rain. Most people just put a large rain barrel at the end of their gutter downspout and let gravity do the work. A fitted lid on a rain barrel is very helpful in keeping mosquitoes from laying eggs in your clean water. You may also like a spigot for your hose or watering can.
Water collected from rain often has lower quantities of chemicals than that of municipal water sources. Rain water can be especially helpful if you have plants that have sensitive pH levels. Rain barrels in the 50-80 gallon sizes are the most popular for gardens.
Savings
Drinking water is a commodity we Americans take for granted. Lowering the energy costs needed by our communities to collect, treat and distribute clean water helps everyone’s budget. A little conservation by us at home can go a long way to conserve our resources at large.
According to the Environmental Protection Agency, every 1 inch of rain falling on 500 square feet of roof can add up to 300 gallons of water. The EPA also estimates that most gardeners in the US could save 1,300 gallons of water just during the hot summer months.

Image courtesy of the National Weather Service
How much water does your area average per year? Click here to choose your state and city, and then scroll down to view your average annual rain fall in inches. Compare these inches to your water bill. You may be surprised at the money flooding out of your gutters every year.
Popular Models
There are many more affordable rain barrels available today than there were ten years ago. Pictured and linked below are a few of the popular options out there. While you may experience some sticker shock at the initial prices, just remember how much you are already spending to water your lawn. You only have to buy a rain barrel once.
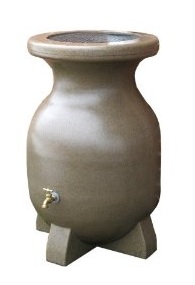
This rain barrel has a classic urn-like profile:
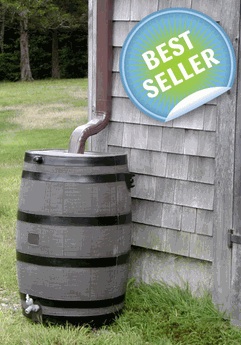
 This rain barrel takes the “barrel” description quite literally:
Short on space? Consider this flat backed rain barrel. It still holds 80 gallons of water.

This water barrel includes a solar-powered pump to help give you more water pressure for your garden hose:
 While we’re thinking about greener barrel options…how about this one?

It is made from recycled plastic, holds 53 gallons of water and is now on sale for $79 and only $10 for shipping. Green and budget friendly, my kind of deal!
Want to try making your own rain barrel? Check out this great DIY tutorial from Better Homes and Gardens.
“Make It Work”
As the fabulous Tim Gunn might argue, one major issue for many people about rain barrels is the aesthetic. I hear you. You’ve made a beautiful garden and/or spent a lot of money and time landscaping your property to be elegant and tasteful. A big, bright plastic barrel against your house was not part of your plan.
Never fear. Paint technology has finally caught up with us and will now allow us to paint plastic. I recommend using Krylon’s “Fusion for Plastic” paints. Krylon is a nationally recognized brand of great spray paint and can be found easily at retailers in most areas.
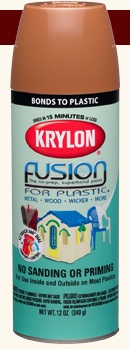
This revolutionary paint comes in many colors that will match or blend well with your house exterior or outdoor areas. Just follow the instructions on the can and be sure to let the paint dry thoroughly before it gets splashed with water. (Just a reminder, I’m never paid or perked for recommending products. I share only because a good product can be hard to find. If this helps you in your home, I’m glad!)
So, there you have it! Another green solution that will save you money, install easily and is available for under $100. You could be saving money before your next water bill arrives!
Any of you readers have any other tips for rain barrels? If you have a water bill, are you enjoying savings and a beautiful green lawn this summer? Please share your experiences in a comment and help inspire others as part of our Greener Living Challenge!
Beyond lemonade
It’s summertime and if your house is like mine, you might have a few extra lemons around the house to use in your summer recipes. If you like the idea of homemade lemonade, I recommend this recipe, from the Simply Recipes website.

Image courtesy of Simply Recipes
However, we shouldn’t just think of lemons as cooking ingredients. Real lemons, their juice, peels and even their already squeezed halves can be a great non-toxic cleaning tools around our homes.
As part of our Greener Living Challenge, I’ve gathered together a list of many ways we can use lemons to clean responsibly (and cheaply!) around children, pets and adults. See if you can find a new use for this mighty citrus in your home:
- Remove soap scum and mildew: Apply lemon juice onto the surface of any soap scum or mildew. Let it sit for up to 2 hours. Rinse the area throughly with warm water. (No room ventilation required.)
- Clean your Tupperware: Mix lemon juice and baking soda into a simple paste and scrub those old food stains right our of your plastic food containers.
- Save your paintbrushes: Boil lemon juice in a pot on your stove top. Soak hardened paintbrushes in the boiling juice for 15 minutes. After 15 minutes, rinse the brushes and your pot in hot, soapy water. Allow the brushes to dry completely before putting them away.
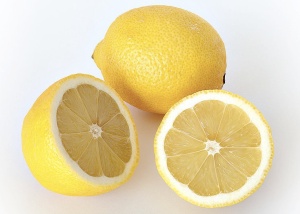
Image courtesy of Wikipedia

- Protect your clothing: Dry lemon rinds in open air for 1-2 days. Fill sachet bags (like these) with the rinds and then hang them in your closets. The lemon rind will repel moths and keep your clothes smelling nicer than moth balls.
- Wipe out your microwave: Place one slice of lemon and 1 cup of water into a glass microwave-friendly bowl. Microwave for 30 second and then let the bowl sit in the microwave as the steam works its magic. Remove the bowl after a minute and wipe down the inside walls of the microwave.
- Perk up your laundry:Add one cup of lemon juice to the washer while washing your white loads, along with your usual laundry soap. Wash as normal. Your whites will look brighter.

Image courtesy of Wikipedia

- Return the sparkle to your glassware: Soak cloudy coffee pitchers, glasses and other similar items in a mixture of lemon juice and water. rinse thoroughly and then wash and dry as usual.
- Make your own metal polish: This solution works on stainless steel, brass and copper only. Make a simple paste of salt and lemon juice and scrub the tarnished surface. Allow the paste sit, untouched on the metal for 5 minutes. After 5 minutes, rinse the metal surface, dry thoroughly and polish as needed.
- Refresh the air in your home: Simmer 2-3 juiced lemons in 4 cups of water over low heat for a few hours to give your entire home a lemony clean scent. Citrus is also a powerful, energizing scent that can lift your mood.
Did you find a new way to use lemon around your home? What idea surprised you on this list? Do you a have another great way to use lemon that you’d like to share? Leave a comment!
Airing dirty laundry
Can you guess what today’s post is about? I like to use related phrases as titles for each post, but today’s post is about exactly what it says, dirty laundry.

Shouldn't all laundry rooms be this pretty? Image courtesy of Canadian House & Home
I have this idea that many of you have gone through what I have gone through when it comes to buying laundry supplies at the grocery store. I have bought the same brand of detergent for years, without even thinking about it. I noticed “greener” and “eco-friendly” soaps appear over the past decade, but I thought, “It’s soap! How toxic can soap really be?!”
Turns out, I was really wrong.
I’m not gonna blast any specific products by name, but I did want to share some info I found about common laundry detergent ingredients. I figure (and I’m guessing that this is exactly what the big soap companies don’t want us to do) that we are all capable of reading our own bottles ourselves and comparing info once we know what all the chemical words mean. Take a look at this little list:
- Phosphates: When these chemicals are released into our natural water systems (lakes, rivers, etc.), they cause algae to have huge growth blooms which deplete the oxygen from the water. This suffocates fish and plant life and can unbalance an ecosystem very severely. Europe is banning all phosphates in domestic products beginning in 2013.
- Petroleum distillates (aka napthas): If you Google “Petroleum distillates”, the first link that pops up is Wikipedia’s entry for “Oil refinery”. That’s who you’re giving money to with every purchase. In case that’s not enough, some of these chemicals have been linked to cancer, lung damage, lung inflammation and damage to mucous membranes. All in the name of clean towels.

Image courtesy of Wikipedia
- Sodium hypochlorite (household bleach): Bleach can’t be bad. People have used it for over a century, right? Did you know that bleach is involved in more household poisonings than any other chemical? Let bleach loose with organic compounds and it also creates carcinogens, which can cause reproductive and immune system disorders. Just how bright do our gym socks really need to be?
- EDTA (ethylene-diamino-tetra-acetate): EDTA is often used as an alternative to phosphates. It reduces mineral hardness in water and allows machinery to run more smoothly in hard water exposure. EDTA can also dissolve toxic heavy metals in the environment, allowing them to re-enter the food chain. Even more scary: you can find it in many food products.

I could go on with a longer list here, but I think you must already be thinking the same things I was: “I put this stuff in the clothing I wear against my skin?!”
Now, I don’t like to bring up a big household problem without trying to contribute a realistic solution or idea. By now you have probably figured out that this is a Greener Living series post, which you can read all about right here. Here’s how we solved this problem at our house:

We now use Seventh Generation products for our laundry. I am not sponsored by Seventh Generation to say pretty things about their products. I only ever recommend products I actually use because I like to be honest about my experiences.
When I was looking for a new laundry soap (after I freaked out and threw out all of the food with EDTA in it from our pantry), I was also looking for a good value of price in eco-friendly soap. Seemed like an impossible combo, but Seventh Generation, which I buy at Target, fit the bill.
I also like that they translate all of the ingredients on the product labels for easy identification.

Do you know where Seventh Generation gets its name from?
In our every deliberation, we must consider the impact of our decisions on the next seven generations. – From the Great Law of the Iroquois Confederacy
I like that idea as a company mission statement. Seventh Generation has a lot of household products available, but I haven’t tried them all. You can browse their full line of products and sign up for some coupons by clicking the link in the picture below.

Bonus tip: If you’ve read this far in the post, I’ll let you in on a secret: Be sure to visit tomorrow’s post for a chance at a great Greener Living giveaway!
Want more Greener Living ideas? Visit this page for a complete listing of products and solutions from previous posts.
Have you used Seventh Generation products before? Do you have another planet-friendly laundry soap you’d like to recommend? Share your ideas and solutions by leaving a comment!