Category Archives: Other
The Cookbook Sagas, part 3
I’m at the next step in my process to clean out my recipe collection, so that no one turns me in as a guest on “Hoarders”. You can catch up and read about the first two steps of this process in these posts:
- Part 1: Where I look at the whole problem and admit I must change
- Part 2: How I clean out and re-format the bulk of my loose recipes

Today, I’m showing you how I’m going to store my re-prioritized recipes. I chose an upgraded 3-ring binder format because my husband and I like:
- Keeping the recipe pages clean and splatter protected
- Keeping the recipes printed large enough to be legible
- Keeping the recipes tidy on one shelf in our kitchen
- Keeping the recipes easy to find within their storage

So, I’m making some pretty, custom and oh-so-affordable binders to store my recipes nicely. This is an easy project and I took pictures as I worked on it this past weekend to show the steps. Just keeping it real for you, friends. This project can be done in very little time and is quite satisfying when you are done.

To start the process, I bought a set of clean, 3-ring binders. I chose binders with those clear pockets on the exterior so I can decorate the covers inexpensively, while still keeping them highly wipeable. I also chose binders that were all variations on the color blue, because I like blue and it looks nice in my kitchen. I already know these binders are all going to sit next to each other on a shelf, so why not make a personal choice of a happy color?
In full disclosure, I did grab these binders from several different stores. I noticed that most stores only carried one or two versions of any color. I wanted more variety, especially knowing each binder would have a different topic. So, as I ran my regular errands around town, I used Target, Staples and Wal-mart to find my colors and stay within my budget.

Next, I popped into several art supply stores to pick up some pretty scrapbook papers to use in the binder cover pocket. Again, I just built this into my errands and grabbed what I like. I am not a scrapbook creator, but I am happy to reap the rewards of the many cheerful and bright papers that are now available for scrapbooking fans. I chose kitchen-themed papers, to keep the binders looking united and fun. Of course, you can choose whatever you like for your home and personalize it for just a couple of bucks. I caught a sale and the papers I chose were under $5 total. Very budget friendly!
I’m matching my fancy-schmancy papers to each binder to make a collection of related-looking finished books. I may switch these papers around with the binders as I make each one. I’m not sure about that aqua binder on the far right in the picture below. A little too bright next to the others, I think.

As for subject titles, each binder will have its own general topic. For example, I’ll make a binder called “Appetizers and Beverages”. This binder will hold the few remaining cut-and-pasted recipes, so I know the look I’m going for with each finished dish. (I was discussing this dilemma in this post.) I’ll probably sort the recipes further, somewhat, inside the binder, but not too much. I really want the freedom to just put the recipes in and know that they are there without creating a time-consuming index or page number system.

Back to the work: To cut the papers to fit each binder cover, I measured the cover pockets individually. You may question why I would go to the effort to do this when I regular 8.5×11 sheet of paper fits easily. However, I want my binder covers to use as much of the pretty scrapbook paper that I can fit into each pocket, while also keeping it reasonable to get the paper down in those pockets with a snug fit.
You can see above that I didn’t measure the entire pocket width, I cheated in about 1/8th of an inch on each side to give myself some paper sliding room. Again, these are all different binders made by different companies, so each measurement was a little different. I also measured the binder spines for paper inserts, so I can have a nicely finished edge facing out of my kitchen cookbook shelf. But, first things first, cutting the paper to fit:

I used my trusty little Fiskars paper trimmer to make even cuts. I bought this paper trimmer years ago, for a wedding stationery project. It has been so handy over the years since, for such a myriad of projects, I can’t remember how I lived without it before. It’s not big or flashy, and every now and then I need to replace the little cutting blade slide (which is very affordable to do), but it gets the job done and it stores very easily. I’m not plugging this product for profit or perks, by the way, just sharing what I actually find useful in real life.
Now that my papers are all cut, I’m typing up little cover labels for each binder. I’m just using plain old Microsoft word to choose an interesting font and then adjust the ink color to go with the related scrapbook paper. Because I have my binder spine measurements, I’m also making a little spine label for each cookbook binder. These may seem small to fit down into the binder, but it is worth it when it’s all done. Cut and glue the labels to the cut scrapbook paper…

….then slide the paper covers into place.

I also like to put a little roll of tape behind the cover binder, just to keep the paper from shifting around as it get used.

To get those narrow binder spines down into the covers, I have two tips for you:
1. Lay your binder open flat, cover side up, before you try to put the spine paper. This allows the plastic spine pocket to have as much “give” as possible as you slide the paper further down.

2. Use a chopstick to act as a guide when you slide the spine paper in place. You’ll never get your finger down where you need it to be in that little pocket, so don’t kill yourself trying. Take a deep breath and just work slowly, little by little, to ease that paper down where you need it to be. It may get a little wrinkled as you go, mine did, but you can work it all out with patience.

Oh, and for those binders that do need some internal sorting, I’m just going to use an extra sheet of colored card stock in a sheet protector to provide a guide. Nothing fancy or expensive and still very practical to keep clean. Here’s an example:

Here’s how great the end result of a bunch of new binders can look:

Nice, huh? I said I was gonna seriously downsize those recipes and I meant it. There are now only four small binders, instead of eight very over-stuffed ones, and all of these new, clean binders are just reasonably full. This means I have plenty of recipes (no need to go looking for more), but that I have a small amount of room if we do find a few new favorites to add to our lives. Progress! These final topics for my binders and why I chose them:
- Favorite Recipes: All of our favorites entrees and any not-so-common special side dishes we love, just tossed together in one place (at last!)
- Vegetables: We love to try new ways to mix up our vegetable varieties at meals, we also strive to have a decent amount of vegetarian entree recipes to mix into our diet for better health
- Sweets: Desserts in every form, including smoothies, cakes, pies, cookies, breads, candy and some interesting fruit recipes
- Appetizers & Beverages: This is mainly party fare/special occasion food with great pictures and suggestions for serving

All in all, I like the way these binders turned out and it made the cleaning out, sorting and typing parts of this saga seem more attainable. I can see where the truly loved recipes will go and as I get there, the paper organization is in place for immediate use. I can’t say that all the typing will get done as fast as these binders were put together, but I’ll get there eventually. The typing is happening and I think I am now ready to address another aspect of this project….

…all of the loose recipes I still have stashed for “later”. But that is a part of this saga for another day.
Gift Idea
Can you see how this custom binder cover would make a great gift idea? You could use it to build a cookbook of favorite recipes for almost any occasion. You could also use it to build a custom recipe book as a group-sourced gift for an individual, such as a bride or new graduate. Each contributor simply completes a typed up recipe page and all of the pages are combined into the binder as a group gift. The customized cover would just make the cookbook all the more special. It’s an affordable gift, but very personal. Just a thought!
Now tell me what you think of this project. I really want to hear your opinions. Am I a little too obsessive in my organization? Do you like the way the binders turned out? What would you do differently? Any tips for the next part of this recipe saga (all those loose recipes)? Blogs are for conversation, so leave a comment!
If you liked this post, you might also enjoy the posts I have written about creating my All-Year Holiday Cookbook and my Magic Cookbook. Feel free to check them out!
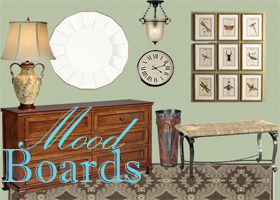
Cooking With Fire
How was your weekend? Did you get outside to enjoy some nice weather? Have you fired up your grill this season? We are loving the fabulous warm weather and our taste buds are ready for some sizzling deliciousness. Time to get our grill on!
I pulled today’s mood board together when I was out and around looking at summer grilling supplies for our home. Whether you are a traditional griller or an adventurous chef, there are some great, affordable…as in “all-of-these-are-under-$20″…tools out there for some serious summer cooking! Here’s what I found…

Where can I buy these things? Just click on the links below to jump right to their retail pages online…
1. Make sure you eat your vegetables with this Fire Wire Flexible Grilling Skewer, $9.99 for a set of 2, at Bed Bath & Beyond
2. New to grilling or want to up your game? Take a lesson from a real pro, Steve Raichlen, with his great grill cookbooks, like this one, $13.14, at Amazon
3. This 12-inch skillet will keep all of those delicious little things, like shrimp or stir fry, from falling through your grill grate, $6.99, at Bed Bath & Beyond
4. Try your hand at smoking some meat with this Mini Smoker Box, only $7.96, at Williams Sonoma
5. Grilled Cheese…made on your grill. Do I really need to say any more? $12, at uncommongoods.com
6. You know what tastes great on the grill with garlic? Everything! Roast up a bulb in this Cast Iron Garlic Roaster, $16.95, from Crate & Barrel
7. Slather on the sauce with this 4-piece set of silicon basting brushes, $9.99, at Amazon
8. Time your steak, or any other food, perfectly with the Oxo Good Grips Instant Read Thermometer, $11.99, at Amazon
9. Clean that grill like you mean business with this 3-in-1 Grill Brush, $7.95, at Crate & Barrel
Are you thinking about lunch yet? Or dreaming of that great smokey grill smell? What is your favorite food to eat hot off of the grill? Are you a BBQ fan, a burger connoisseur or a kebabs aficionado? Share your favorites in a comment!
Pssst! Did you remember that Father’s Day is also creeping up on us? Have you found a gift for your dad yet? If you want to use this mood board for some grilled-themed gift inspiration, I won’t tell!
The Cookbook Sagas, part 2
I’m back with a progress update on my efforts to downsize my recipe hoarding collection. I’m actually really good at organizing things. Events, closets, information, home design, travel plans…but recipes, as a subject, seem to be my Achilles heel. I see potential in way too many of them and it has gotten out of hand in my kitchen.

This series of posts is my attempt to document my progress as I clean out. When I last left off with part 1 of this organization problem, I had accomplished two things:
- Admitting I had a problem
- Trying to figure out how to clean out the mess I had made
Those might not seem like huge steps forwards, but these warm seasonable evenings are when I start to really scout out new recipes to play with over the summer. Something new in cuisine type, something different in ingredients and or something more experimental in technique for me. All of these concepts lead to more recipe clipping when I find something interesting.
So, I decided to empty all of the recipes out of the eight (yes, eight) binders of clippings I had created over the first couple of years of marriage, years ago. These are all of the pages I had left:
Well, not exactly. This is what was left after I cleaned out all the pages I didn’t want. And, in fact, this does not include the “Chicken & Beef” binder that is stilled used so regularly. Let me back up.
First, I pulled all of the pages out of (almost) every binder. And as I did that, I tossed or cleaned and saved-for-later-recycling all of the salvageable sheet protectors. I would hate to spend more money on sheet protectors if I can just give them good cleaning and save my pennies. That’s just how I roll.
Next, I sorted out duplicates of recipes. This was a bigger problem than I expected. Apparently, there were periods of my life where I needed to own every variation of Potato & Leek Soup, Lemon Muffin, Ham Salad and Deviled Egg recipe. I know this because those recipes, among others, were noticeable themes spread across many pages within their sections of the binders. Clearly, I was thorough.

Too many potato salads.
After I had finished the duplicates purge, I started crossing off things I know we will never make. You can see that in the picture above. These might be perfectly lovely recipes, but if I already make something similar, I’m good. I also crossed off things that sounded delicious, but might require a Master Class with Martha Stewart to actually make in my home. Frankly, I think life is too short for that scenario. (On many levels.)
As I tossed things, I did keep recipes that I had made notes on, like this one:

My mother always makes a similar Buckeye bar for my husband because she knows he loves them. She likes to make them as her special treat for him and I have never actually gotten the recipe from her. (This is probably better for our waistlines anyway, really. Since we only enjoy them on special occasions, they disappear quite quickly.) I had stumbled across this recipe that I had meant to ask Mom about and there it was, hiding 37 pages back in the binder. I kept this type of notated recipe, along with others we had made and liked, because that had been the original point of these binders.
The last step of the binder page tossing was having Mr. CARO help make a ruling on the remaining recipes, which you saw in that stacked photo above. He is always an enthusiastic co-chef in the kitchen, so I was worried he would actually enable me to keep more recipes than I need. However, he was really great at browsing the ingredients and thinking about when in the year we would most likely enjoy the recipes. It was great to get a second opinion.
Does this sound overcomplicated to do this kind of sorting for a bunch of recipe clippings? It may be. But Mr. CARO and I love to do the grocery shopping together, because when we do, we feel like we have a better connection to what we cook together. We also make our evening meals about conversation over the table, which helps us appreciate our food, eat slower and connect more at the end of our busy days. This may not work for everyone, but we love it.

While Mr.CARO was helping me pitch recipes, we got to the dessert and appetizers binder sections. Many of these recipes have very important visual references for how the food is served, like the trifle you see pictured above. (I love making trifles in the summer.) We may need to keep some of these pictures to show how the dishes come together, but I’m still trying to figure out how to show the pictures in a tidy, manageable fashion. (To be determined…)
The issue we did solve is how to store all the recipes we are keeping. We’re upgrading the binders concept. After much discussion, Mr. CARO made a great case for how easy it to use a sheet protected recipe both in the binder and clipped to the hood over our stove. He liked that he didn’t have to worry about spills and that we could add our own notes easily, as we need to.
I liked that I can flip through the binder pages quickly to find something specific. I have never been able to work with the tiny recipe cards our grandmothers and great grandmothers used. Case in point, pictured below is a family recipe given to by my Great Aunt Millie. (You can read more about one of her great life philosophies in this post.)

I had originally typed this recipe so I could read it without squinting while I was cooking. (Tiny, delicate handwriting from the ‘1950’s + steamy kitchen = much re-reading.) However, as you can see, this one recipe takes up a whole sheet of 8 1/2 by 11 paper this way. Either we would need to tack on a separate kitchen library for our recipe binders or I would have to make these pages more manageable. This is the new version of this typed recipes format:
Doesn’t that look much more approachable? It feels that way to us, too. This does mean that I’ll have to type out all of my remaining recipes into this simple format. However, I don’t mind doing this, because it also make it easier to share my recipes. If you ask me for a recipe, I can just print or email you a copy. Plus, you’ll probably get a bonus recipe of whatever is printed on the page with it.
I’m not under any delusions about this method. All of this typing will definitely take some time, but I can work on it over the summer, little by little. It will be so worth it when I am done. So personalized and so functional. That’s kinda the feeling I want with all of these family and favorite recipes anyway. Better to savor what you love and respect it by taking care of it.
I also have plenty more to do on this project in the meantime, like make new binders. In fact, that is what is coming up next week: Making happy, handy, affordable binders to work in your kitchen. I’ll be taking pictures as I make mine this weekend and I will show you how to do it, too! Here’s a little preview:
Now I’d like to hear about your recipe experiences. Does this project make you think about your own recipe system? How do you store your absolute favorite recipes? How do you share your recipes with friends? Have you ever discovered you had a stockpile of similar recipe themes? Dish with me in a comment!
Collapsible Kitchen Tools
This is my salad spinner, at home, in my kitchen.

It is the inspiration for this post. I have been meaning to write about my salad spinner for a while because it is rather popular in my house. Mr. CARO looooves using it. As in “Honey, it’s not a lawn mower. You only need to pull the string once.” (I sometimes think he is trying to get it to take off like a helicopter.) Friends and family members have asked more about this salad spinner when they have seen it in action.
I have to admit, I have given several of these salad spinners away as gifts. Christmas, house-warming, weddings. It has fit as an appropriate gift for many occasions. I, myself, never wanted to own a salad spinner until I saw this one. But when I did see it. I WANTED it.
I never liked salad spinners before because they were all giant, lined bowls that took up a big footprint wherever I could have put them. And it’s not like you can store a lot in them when they are put away because the lid makes it cumbersome.
My salad spinner does this:

I love kitchen tools that work hard and store small. I have between a small and medium-sized kitchen, so I don’t have a ton of extra cabinet/pantry space in my kitchen. (Does anyone out there have “extra” kitchen cabinets?) When something can get the job done really well AND store nicely with other things, I am interested immediately.
Besides my friends and family, I’ve found many clients who also appreciate a great space saver in the kitchen. Sometimes because they don’t cook much and need more cabinet space for pantry items, sometimes because they like to cook a lot and need a way to fit more tools/gadgets together in an already packed area, and sometimes because they don’t have a huge amount space to begin with, so they have to make every inch of storage count. Do you fit in any of those categories?

One of my very own pots and pans drawers. Just keepin’ it real, friends.
Since I love my salad spinner, I’ve payed close attention to other items I’ve seen pop up recently that offer similar storing options. Who can’t use more storage space in their kitchens? So, today’s post is a fun list of fabulous kitchen tools that collapse down into smaller, more storage-friendly shapes. Whether you rent or own, these are practical items for real life.
Oh, and I’ve linked all the pictures below directly to their shopping sources to make purchasing easy. Just in case you need one for your kitchen, or a wedding present, or a hostess gift…you get the idea. Just click on the picture to link to the item. Here we go!
SALAD SPINNER

Image courtesy of amazon.com
You knew I was going to start with this one. You can use the outer bowl as a nice separate serving bowl, which makes it a double-duty tool. For $23, I love the reasonable price on this spinner, too. I don’t understand why some spinner models are close to $50 for what is really a couple of plastic bowls.
COLANDER

Image courtesy of amazon.com
Okay, technically, you can use the interior salad spinner bowl above as a colander for fruit and veg. However, if you are going to be draining something hot, like pasta or boiled potatoes, I always chose metal surfaces over plastic. The silicone in this bowl, (like most silicone tools) can withstand temps up to 500 degrees. This little baby also comes in a variety of fun colors to choose from, several different sizes and features a handy metal loop for those of you who like to hang your pots and pans.
BAKING / COOLING RACK

Image courtesy of amazon.com
This is the thing you stack lots of sheets of cookies on when you are prepping them to bake or taking them out of the oven to cool. This thing is perfect for kitchens with next to zero counter space. (Any NYC peeps reading this post? I got your back.) The rack folds so flat you can slid it into storage like a tray. 20 bucks. Genius.
BAKED GOODS STORAGE/CARRIERS

Image courtesy of amazon.com
Where are you going to put all those delicious baked goods after you have used your awesome, foldable cooling rack? Well, if you are taking them to an event, you have several handy choices based on the type of goodies you’ve made. There is a carrier for layer cakes and cupcakes, pictured above. There is another version of this carrier which can carry two 9-inch pies (or up to 24 deviled eggs)…

Image courtesy of amazon.com
…and even a third version of this product for sheet cakes. (That reminds me, I have to share my favorite sheet cake recipe with you this summer. Yummmmm.)

Image courtesy of amazon.com
FYI: If these storage carriers cause you to bake more sweets in your kitchen, I am NOT responsible. I have a similar disclaimer on my Brownie Pie recipe for a good reason. Don’t send me emails about needing to buy larger jeans. I’m probably already at the store trying on new pairs, myself.
DISH DRAINER

Image courtesy on amazon.com
Every kitchen has some items that won’t go in the dishwasher. If your kitchen doesn’t have a dishwasher, or at least a non-human one, you may love this item even more. At only $20, this dish drainer can even adjust to fit over different-sized sinks. I like that it includes a silverware divider and can be collapsed small enough to run it through your dishwasher when you need to…uh, again, the non-human kind of dishwasher.
CUTTING BOARD

Image courtesy of amazon.com
Like the over-the-sink drainer above, this cutting board adjusts to the perfect size you need. The bonus feature is that it includes a fancy-schmancy collapsible colander bowl, so you don’t lose any of those delicious strawberries into the sink or drain while you are hulling them. (Oh, the humanity.)
MIXING BOWL

Image courtesy of amazon.com
This 3 quart mixing bowl is by the same company that makes the salad spinner and the dish drainer above. Clearly, they have built upon a great product line. They also carry a large collapsible tub and a nice set of 3 prep bowls that include lids. Amazon has a deal where you can buy all three for items as a set for $40.
BOX GRATER

Image courtesy of amazon.com
I’ll admit it. I’m not a huge fan of box graters. I love eating cheese, but I am not fond of working so hard to shave a big block of it down. Mr. CARO is the cheese-grating czar at our house and he has the manly biceps to prove it. However, this foldable option looks much less intimidating to me. And I know it exactly where it would fit better in our cabinets, rather than the one we have now that always seems to be right in my way every time I’m looking for something else.
MEASURING CUPS & SPOONS

Image courtesy of Sur la table
No more trying to nest all those little spoons and cups in the right order in the drawer! Just toss them all in there and let the lay flat. Wish I had thought of this idea and gotten the patent. At this rate, if you go get all of the items on this list, you may actually end up with an “extra” kitchen cabinet.
BEATER/WHISK

Image courtesy of gretelhome.com
Finally, someone came up with a smaller version of a stirring tool that always gets tangled in every drawer. The colored ring on the handle of this beater slides down to close up the loose tongs so they don’t splay out or snag while being stored. Like so:

Image courtesy of gretelhome.com
As you can see, this tool is also available is in several fun colors. I like that is made of silicon, so it can work in both stainless and non-stick cookware. I can always use extra drawer space. Now if only someone would make a collapsible potato masher…
ROLLING PIN

Image courtesy of amazon.com
Okay, this item doesn’t collapse, per se, but it is worth mentioning for its savvy design. It would make a great wedding or bridal shower gift. It allows you to store an included set of cookie cutters within the pin itself. For more experienced bakers, you can fill the pin with ice cubes to keep your dough from getting to warm while you’re rolling it out. So smart.
DESSERT TIER

Image courtesy of gretelhome.com
I saw this little beauty advertised in Real Simple magazine last month and had to include it. It stands at 20 inches tall when assembled. All seven of these separate tiers stack down into the base for storage. How great is this for easy entertaining in your home? I may have to put this on my list for Santa this year, then I can serve him cookies on it next Christmas Eve.
So, that is my long-ish list of what I’ve found out there. Pardon me for being a tiny bit ramble-y in this post, but when I find a great organizational solution (or 15), I like to share it. Now I want to hear from you.
What kitchen tool still needs to be re-created in a collapsible form? Can you think of something? Is there an item that I missed out there on the market when I made up the list for this post? What is the most awkward kitchen tool you wrangle onto a shelf or into a drawer?
At least leave a comment so I know I’m not the only one out here with overflowing kitchen shelves. Dish with me!
The Cookbook Sagas, part 1
I’m Cathryn Olson and I’m a Recipe-aholic. (Is that a real word? It should be.)
They say admitting you have a problem is the first step toward solving it. However, in my experience, with this particular issue, it just means you find more shelving to load up. I have way too many cookbooks and recipes. WAY. TOO. MANY.

This is just one small handful that I grabbed for a picture.
To be fair, I LOVE to cook. Not everyone does, but I like discovering new ways to put flavors together and trying foods from different cultures. And sometimes I like telling myself I will try the most difficult cuisines on the planets if I could just find the right cookbook to make them easier for me. (We’ll re-visit this vicious cycle later.)
To also give credit where credit is due, my husband (Mr. CARO) now loves to cook, too. I did not find him this way when we started dating. He did cook for himself, which was refreshing to find in a guy, but it was mainly salads and what I call the classic “Bachelor Boil”. Boil pasta, boil sauce, boil soup, boil eggs… (Ladies, can I get a witness?) However, the man was game to try new any recipe and what more can you ask for in a recipe enabler partner? Mr. CARO is an excellent cook.

Mr. CARO’s apron of choice
So, when we got married I started collecting recipes in a much more purposeful way. I scanned magazines, I searched online, I actually read many of the older cookbooks my mom had offloaded onto me in an effort to diminish her own recipe stockpiling tendencies. (See, nature and nurture. This really isn’t my fault.) As I collected , clipped and printed recipes that sounded good, I decided to paste them all onto card stock and put them in sheet protectors, in three-ring binders. Sounds logical and organized, right? I was very efficient at this. In five years, I had 8 full 2-inch binders. EIGHT.

Soooo much time spent gluing.
These binders were so full I had to dig every time I wanted to find a recipe that A) we had already tried and B) that we liked. This was my recipe for a What’s-for-dinner nightmare. So I stopped gluing, because clearly the binders weren’t working so well and I didn’t want to spend more money on more of them when I didn’t have the shelf space for them either.

Go ahead, judge these books by their covers.
Did I mention that I had three more shelves of regular cookbooks? Yeah. There has to be a support group for this somewhere. A support group that never serves snacks so nobody can ask for a recipe. I asked my own support group Facebook friends what they did to keep their recipes organized. They made me feel really normal. Especially my childhood friend who admitted to laminating ALL of her recipes. (You know who you are and I love you for that answer!)
So that’s where the idea for this post series came from…paper hoarding in my kitchen. Is this problem solved? Noooooooo. But I’m working on it and have found some real solutions. I thought I would document my progress since I realized that this is a more common problem than I had originally thought. I also thought that by documenting my progress on the blog I could publicly shame myself into staying on task. (Bonus!) I’ll be blogging this project in real-time, so I can keep my solutions honest.

Note to self: These tools are not my friends in the kitchen.
The one thing that I can tell you I have done so far is donate a whole bunch of the really old cookbooks that my mom and I never used to my local library. I’m still not sure if this was a good deal for the library, but they took the books anyway. If you happen to find yourself in the Main branch of the Enoch Pratt Free Library in Baltimore, there are several shelves in the cookbook section that warrant some sort of “donated by” plaque with my name on it. And if you are seeking complicated ways to display 1960’s tuna casseroles or 1920’s ingredients you would never bring in your house let alone eat, it may be your lucky day!

An old cookbook from my great grandmother. And yes, that says “Opossum”.
There is much more to this saga and I’ll share more with you on my progress next week. In the meantime, how do you store recipes in your kitchen? Do you keep old cookbooks that you may never use? Have you ever lost a favorite recipe? Don’t leave me hanging out here, friends! Share your stories!
St. Nicholas Day
This coming Tuesday is St. Nicholas Day, December 6th.
Do you celebrate this holiday in your home? In many parts of the world, people do. Especially children. We have our own, grown-up version of this holiday tradition for this day in our home, which I’ll share with you below.

Image courtesy of penpallingandletters.blogspot.com
History
The religious figure of St. Nicholas comes to us from 4th century Greece. He was the Bishop of Myra, which is now part of modern-day Turkey. (How that happened is a much longer story for another day.) It will probably nor surprise you that St. Nicholas is the patron saint of children. He is also the patron saint of sailors, fishermen, merchants, broadcasters, the falsely accused, repentant thieves, pharmacists, archers, pawnbrokers…and prostitutes. (Everyone needs someone looking out for them, but we’re gonna just ignore that last one and move right on with today’s story.)
The gift-giving part of St. Nicholas’s biography stems from lots of stories and legends of his kindness to his neighbors. In most cases, he leaves behind a small bag of gold coins (much like the chocolate ones you see in the shoes shown above) to help a neighbor in a financial difficulty. Sometimes these gift bags are tossed through and open window or down a chimney overnight, including one instance where the chimney toss landed the bag into a pair of freshly washed stocking drying by the fire… Sound familiar?

Most importantly, the gifts were anonymous, because so no one ever saw them actually delivered. They just appeared, as if by magic, to make someone’s life better. The selflessness of the giver is part of the greater message to give help and happiness to others where you are able. This is still a rather relevant humanitarian message for today’s world, regardless of any more specific religious beliefs.
European traditions
Most countries of Europe celebrate St. Nicholas Day, which is always on his feast day on the religious calendar, December 6th. In many places, St. Nicholas looks like an early step in the evolution of America’s Santa Claus image, half way between the religious bishop portraits and the jolly old elf with reindeer of C. Clement Moore fame.

Image courtesy of Wikipedia
One of the most common ways to celebrate St. Nicholas Day is for children to leave out their shoes, outside their bedroom or outside their house, as they go to bed on the evening of December 5th. St. Nicholas, Sinterklaas, Père Noël, or whatever his name in each country, will stop by and leave little gifts and sweets in the shoes to be discovered in the morning.
It is treated as an opportunity for children to remember how nice it is to get a thoughtful gift and to treat others with kindness and well-mannered behavior. I can imagine that in centuries past, as cold, hard winters beat at the doors in rural communities, kindness and concern for others was an important value to instill in children. Still not a bad lesson for today.

Image courtesy of stnicholascenter.org
Our tradition
I spent several years in Germany as a child and because my parents believed in embracing the other cultures we were lucky to live in, December 6th became a part of our yearly celebrations. As luck would have it, my husband is descended from German American immigrants, so we have kept the tradition going.
We don’t have any children yet, but we have evolved the tradition for now to be a small gift to each other with a Christmas theme. This under-$20 gift can be anything to put us in the holiday spirit. Over the past years, they have included books, music, movies, seasonal treats, Christmas ornaments, holiday decor and charitable donations. It is amazing how a little thoughtfulness can help you be mindful of opportunities to help others when they present themselves. Regardless of where in the world we may celebrate Christmas, giving to others is the best gift.

Image courtesy of wilmette.blogspot.com
Do you like the concept of a St. Nicholas Day celebration? How do you mark the beginning of the Christmas season in your home? Do you have a favorite way of giving to your community during the holidays? Share your celebration traditions in a comment!
Advent-tageous
Well, hello again!
It’s so nice to see you here! I’ve been away working extra long hours to help my clients get their homes ready for holiday entertaining. I’m happy to report that all of our goals and deadlines were met in time for some serious Thanksgiving feasts. My one worry was that when I returned to blogging that all of my readers had given up on me. (New Year’s Resolution #1: Find better work/rest life balance.)

Image courtesy of servicelearning.org
What have you been up to lately? Did you eat your fill of turkey and dressing? Did you get to enjoy some time off to relax? Are you ready for the calendar to roll over into December? December! Can you believe it has crept up this fast this year?!
Speaking of calendars, I thought I’d share sources for something to help us ease into the next big holiday. In my travels through the internet and stores at this time of year I see all kinds of holiday decor. (More eye candy coming on Wednesday!) Several of my friends have asked me to watch for these items, so I’m guessing some of you might be looking for them, too.

I’ve gathered a list of sources for Advent calendars. I grew up with these in Europe and they seem to be more popular every year over here. I have found both the candy ones and the ones you can fill yourselves, in case your kids don’t need more excitement through extra sugar.
I’ve also tried to find them in a variety of price ranges so we can all stay within our budgets. All of the images above and below are linked directly to their retailers to make shopping for them grabbing them before they disappear easier. You can just click on the pictures!
Candy-filled Advent Calendars
In my experience, all holiday planning goes more smoothly if you have a mouthful of chocolate. Exhibit A: Santa’s waistline. It seems to me that the only dilemma with candy-filled Advent calendars is making sure the candy tastes good. Here’s what I found:
Trader Joe’s
I found these chocolate-filled Advent calendars on Amazon. I’d never noticed any Trader Joe’s products on Amazon before, but maybe I just haven’t been looking since I live near two store locations.

Trader Joe's 24 Chocolate Days Till Christmas Santa's Workshop Advent Calendar Filled with 24 Milk Chocolates
I’ve had other chocolate products from Trader Joe’s before, so I can safely guess that this chocolate will taste good. These calendars are moving fast on Amazon, so if you want one before they run out of stock, I’d grab it now.

Trader Joe's 24 Days of Milk Chocolate Christmas Tree Advent Calendar
Moonstruck Chocolate Co.
The Advent calendar I showed at the top of this post seems more for adults, especially with it’s gourmet price tag. While I’m not familiar with this chocolate company, this calendar is certainly filled with some mouth watering treats. Take a look:

Mmmmm. Chooooocooooolaaaaaate…. What? Sorry!
I was rather surprised at some of the places I didn’t find candy-filled Advent calendars. Really, Williams Sonoma and Godiva? This product seems to fit your brands so perfectly.
Whole Foods
Not only is this chocolate really good, it’s vegetarian, kosher and is guaranteed fair trade. You can eat this chocolate in the name of making the planet a better place to live.

Divine Chocolate Divine Milk Chocolate Advent Calendar
I haven’t seen this calendar in my store yet, but I’m going to look for it. Maybe they have already been bought out…yikes!
Fill-them-yourself Advent Calendars
I kind like the concept of these types of Advent calendars because they are open to more creative gift ideas. A cool eraser, a new matchbox car, a pretty hair clip…lots of potential for easy, affordable solutions. Plus, you only have to buy the calendar once and you can re-use it for years. Here’s what I found:
Ikea
New this year from the people who got you hooked on lingonberries, this very affordable ($10!) Advent calendar was flying off the shelves when I was at Ikea last weekend.

YRSNÖ Advent calendar (No idea how to pronounce that.)
I like that it has a non-boxy shape and weights only 1 lb. Easy storage for next year! It would even make a creative host/hostess gift.
Target
To be fair, I browsed Target for Advent calendars before Black Friday and Cyber Monday, so I can’t promise that their inventory has not been decimated by that crazy Target commercial lady and her friends. I like the style option of this model…

Home Mirrored Advent Calendar
…but I would recommend buying these in the stores, so you can see that the quality of construction is good. Some of the individuals ones I found in the store had drawers that don’t close properly and/or wonky mirror application. Sorry, Target. Gotta keep it honest for my readers!
The Metropolitan Museum of Art
Looking for something a little more artistically sophisticated in your Advent calendar? You’d think this source would offer lots of pricey options, but all of their advent calendars come in under $20. I love the creative forms they offer, like this one:

Wiener Werkstätte Advent Calendar
As each day passes you open up the calendar page and add another little ornament to the paper tree. This would be great in a younger child’s room. How fun to have your own little tree!
This next calendar is actually pre-filled, but it replaces the traditional chocolates with Christmas stickers:

My Art Museum Sticker Advent Calendar
I like this idea. However, I have a friend who pointed out that the candy sugar rush burns off rather quickly, but she could still be staring down a Christmas sticker next July. Any other parents out there want to weigh in on this?
I also like this calendar, because I love the colors and its design. You open each drawer to remove a Nativity scene character, which helps you build a Nativity scene by Christmas Day. You also turn the drawer around to slowly create a tree full of graceful angels:

Christmas Tree Advent Calendar
It has nice sized drawers, which could be used for other little treats in future years. Aren’t those fun? You can see all of the Metropolitan Museum of Art’s advent calendars in their online shop, linked right here.
Ballard Designs
This last source is a company I use a lot with my design clients because they have great quality of construction. If you are a fan of them, too, you might have already spotted some of their furnishing in some of my past client mood boards, which you can browse right here.
I love this advent calendar:

Holiday Countdown Advent Calendar
I like the almost-doll-house feel of it. This is another version of the drawer calendar openings. I like that you could decorate the house more with ribbons and garland to your own tastes. I like the size and that it can sit almost anywhere in a home.
Do you use an Advent calendar in your home during the holidays? Have you been looking for one recently? What is the best thing you ever got from an Advent calendar? Who else is still craving chocolate? Leave a comment and share some holiday cheer!
How to keep your holiday cooking sane
This time of year is a very busy time in my work with clients. Because the holidays are approaching, many of my clients need their projects completed in time to entertain family and friends. My work load at this time of year makes keeping myself organized at home for our holidays more than the usual challenge it is.
With the holidays approaching, the last thing I want is extra last minute trips to the grocery store for forgotten items. This post is about a solution I came up with to fight my own holiday food planning scatter-brained-ness. (Is that a word? It is now.) It looks like this:
 Truth be told, a few years ago I had to really search for a favorite old family Christmas recipe. I thought I had lost it and couldn’t remember where I had put it away, very safely, the year before. I eventually found it, but I decided I never wanted to go through that again. For the next year, I needed a new plan.
So, I bought myself a small three-ring binder with a plastic cover, so I could wipe it clean easily. I bought some cheery scrapbook paper to slide into the cover and spine, to help me distinguish this cookbook binder easily when I need it. I labeled the spine and the cover clearly and then started my holiday recipe gleaning.

To protect each recipe, I filled the binder with plastic sheet protectors. I am normally relatively tidy when I cook, but at the holidays, when there are so many dishes and so much conversation going on at once, spills happen.
 (Okay, those clear sheet protectors don’t photograph well, but you know what I’m talking about.) Next, I pulled out all of our favorite holiday recipes for the closest approaching holiday of the year, which was Thanksgiving. Then, I typed them up, little by little, over a couple of nights in front of the tv. (Martha Stewart really doesn’t live here.)
After they were all typed, they became the first pages in the new recipe binder. When I got to the next holiday, I just worked on the next batch of recipes. One month after another, I put them in the binder in the order of the year. Here’s a look at a page from December:

By the time Thanksgiving rolled around next year, my holiday recipe book was done. Not only do I now know where these recipes are stored, but my husband does, too, and can we can tag team organizing the grocery lists much more easily. It is also nice to have clean, printable versions of favorite family recipes to share with other family members and friends.
While I was making these pages, I also added in a couple of helpful cheat sheets, like this one from Real Simple:

No more digging around for random tips and slips of paper when we plan or while we cook. I glued my favorite holiday cheat sheets onto a pieces of cardstock and they all get stored together for their holiday between the relevant pages.

That’s my little system for sanity through any holiday cooking extravaganza. I can’t tell you how nice it is to never have to dig around for those recipes every year. Do you have a special way to store your favorite recipes? Have ever lost a favorite recipe? How many recipes do you cook up at your biggest holidays? Share your stories in a comment!
Looking for more home organizational ideas? You can see my running list of them right here, including one of my other favorite cookbooks. Looking for more recipes? Here’s the link to everyone I’ve posted so far.
The life of spice
I thought of the subject of this post months ago, but I decided I would save it until we were into the cooler Fall months. As the summer months pasted, I thought of more and more topics to include in this post. So, now that it is time to write this post, I can’t decide what category this post should fit into on this blog. My choices seem to be between:
- Design Vocabulary
- Organization
- Furniture
- Food topics
So, I have decided that the answer is: Yes. All of them. We’re talking about spice today. Just like any good spice that can be used in multiple dishes, this subject is a part of many larger topics.

Image courtesy of Wikipedia
History
In the 16th century, finding islands with exotic spices was the Space Race of it’s day for sea-faring European countries. Massive fortunes were made or lost on the success or failure of a trading company’s ability to get its ships around the world and home again with a full cargo of spices to sell.
City states like Venice and countries like Portugal and Holland invested heavily in ships and trading ports designed to get spices back to their own European markets. Spices were in high demand to give flavor to foods and to work as preservatives in kitchens from every class of the European population.

"MAURITIUS off Rotterdam" in 1601. Image courtesy of gordonmiller.ca
Storage
Because it took so much work to bring the spices to the European markets from far away places, often a distance of over 6,000 miles, spices were expensive. With the experience gained from these arduous journeys, spice merchants quickly learned how to ensure that their precious cargo arrived as fresh as possible. No one wanted to pay for an expensive spice expedition and have the product arrive stale months later.
What the spice merchants learned is that heat and light are the most dangerous enemies of any spice. Whether it was an common black pepper or and elusive cinnamon, exposure to heat and light dried all of the flavor out of them. As a consequence, spice ships were large, with deep, dark holds for hundreds of thousands of pound of spice that were undisturbed on the return voyages.
Spice merchants around the world also needed to keep their merchandise fresh as they sold it to customers. We can see a common solution to the light and heat problem, on a shopkeepers display scale, in this example:

Image courtesy of artsofasiacorp.com
This spice chest, or apothecary chest, is from Asia, where spices were used for both cooking and medicinal purposes. Each drawer contained the spice label on the drawer’s front and was kept behind a store keeper’s counter to keep the costly spices protected.
Have you ever thrown away an old bottle of spice, well past its “use by” date? It always makes me rather mad at myself when I have to do it. In 16th century homes across Europe and, eventually, the New World, caddies and mini spice cabinets where carved to store these luxurious pantry items safe and functional for as long as they could be kept. These could be ornate and crafted by high-profile cabinet makers, like this Regency-style spice cabinet:

Image courtesy of pbs.org
or they could be simple and functional in a classic way, like this Shaker-style spice box:

Image courtesy of ebay.com
With the progresses in ceramics technology, canisters were eventually developed to keep storage functional (no light or heat!) yet still be decorative for the display of such luxury items. Here’s an example of a common spice canister shape:
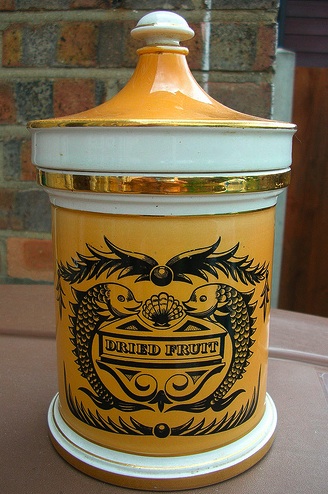
Image courtesy of beetle2001cybergreen's photostream on flickr.com
Modern Storage
With the development of refrigeration techniques in the 19th century, spice demand dropped significantly. There were no longer needed for food preservations, but primarily food flavor. As transportation systems advanced, the lengthy travel routes to obtain the spices also became obsolete, causing a sharp drop in prices.
However, the two old enemies of spice are still around, yet we seem to have forgotten about them. Exposure to light and heat can cut the flavor and effectiveness of spices in your recipes by half their natural lifespan. That means your spices could only be good for 3 months if you are storing them in your kitchen like this:
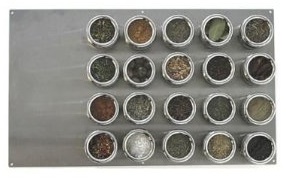
Image courtesy of Amazon
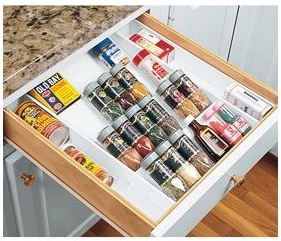
Or some variation of this:

Image courtesy of Amazon
As a person who loves to cook, I hate to see this kind of waste in a kitchen. As a designer, I want to get the word out to help clients and blog readers to remember the wisdom those spice merchants learned all those years ago.
There are so many great, affordable spice storage options available today that keep our spices handy yet still protected. Here are just a few examples from online retailers:
"Expand-a-drawer spice rack", is only $18 on Amazon

"Super Spicestack", $35 on Amazon (These hold 27 bottles each and can be stacked in multiples.)
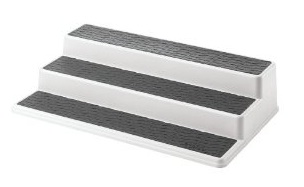
"Copco Non-Skid 3-Tier Cabinet Organizer" only $10 on Amazon
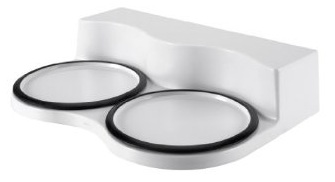
"OXO Good Grips Rotating Spice Organizer", only $20 on Amazon
The round parts of that Oxo organizer are turntables, to make it easier to browse your spices. Nice design!
Wanna see my solution for my own kitchen. (I practice what I preach, my friends!) I use the high cabinets above our sink for spice and baking supply storage. Mr. CARO and I are both rather tall, so we can reach these shelves easily.
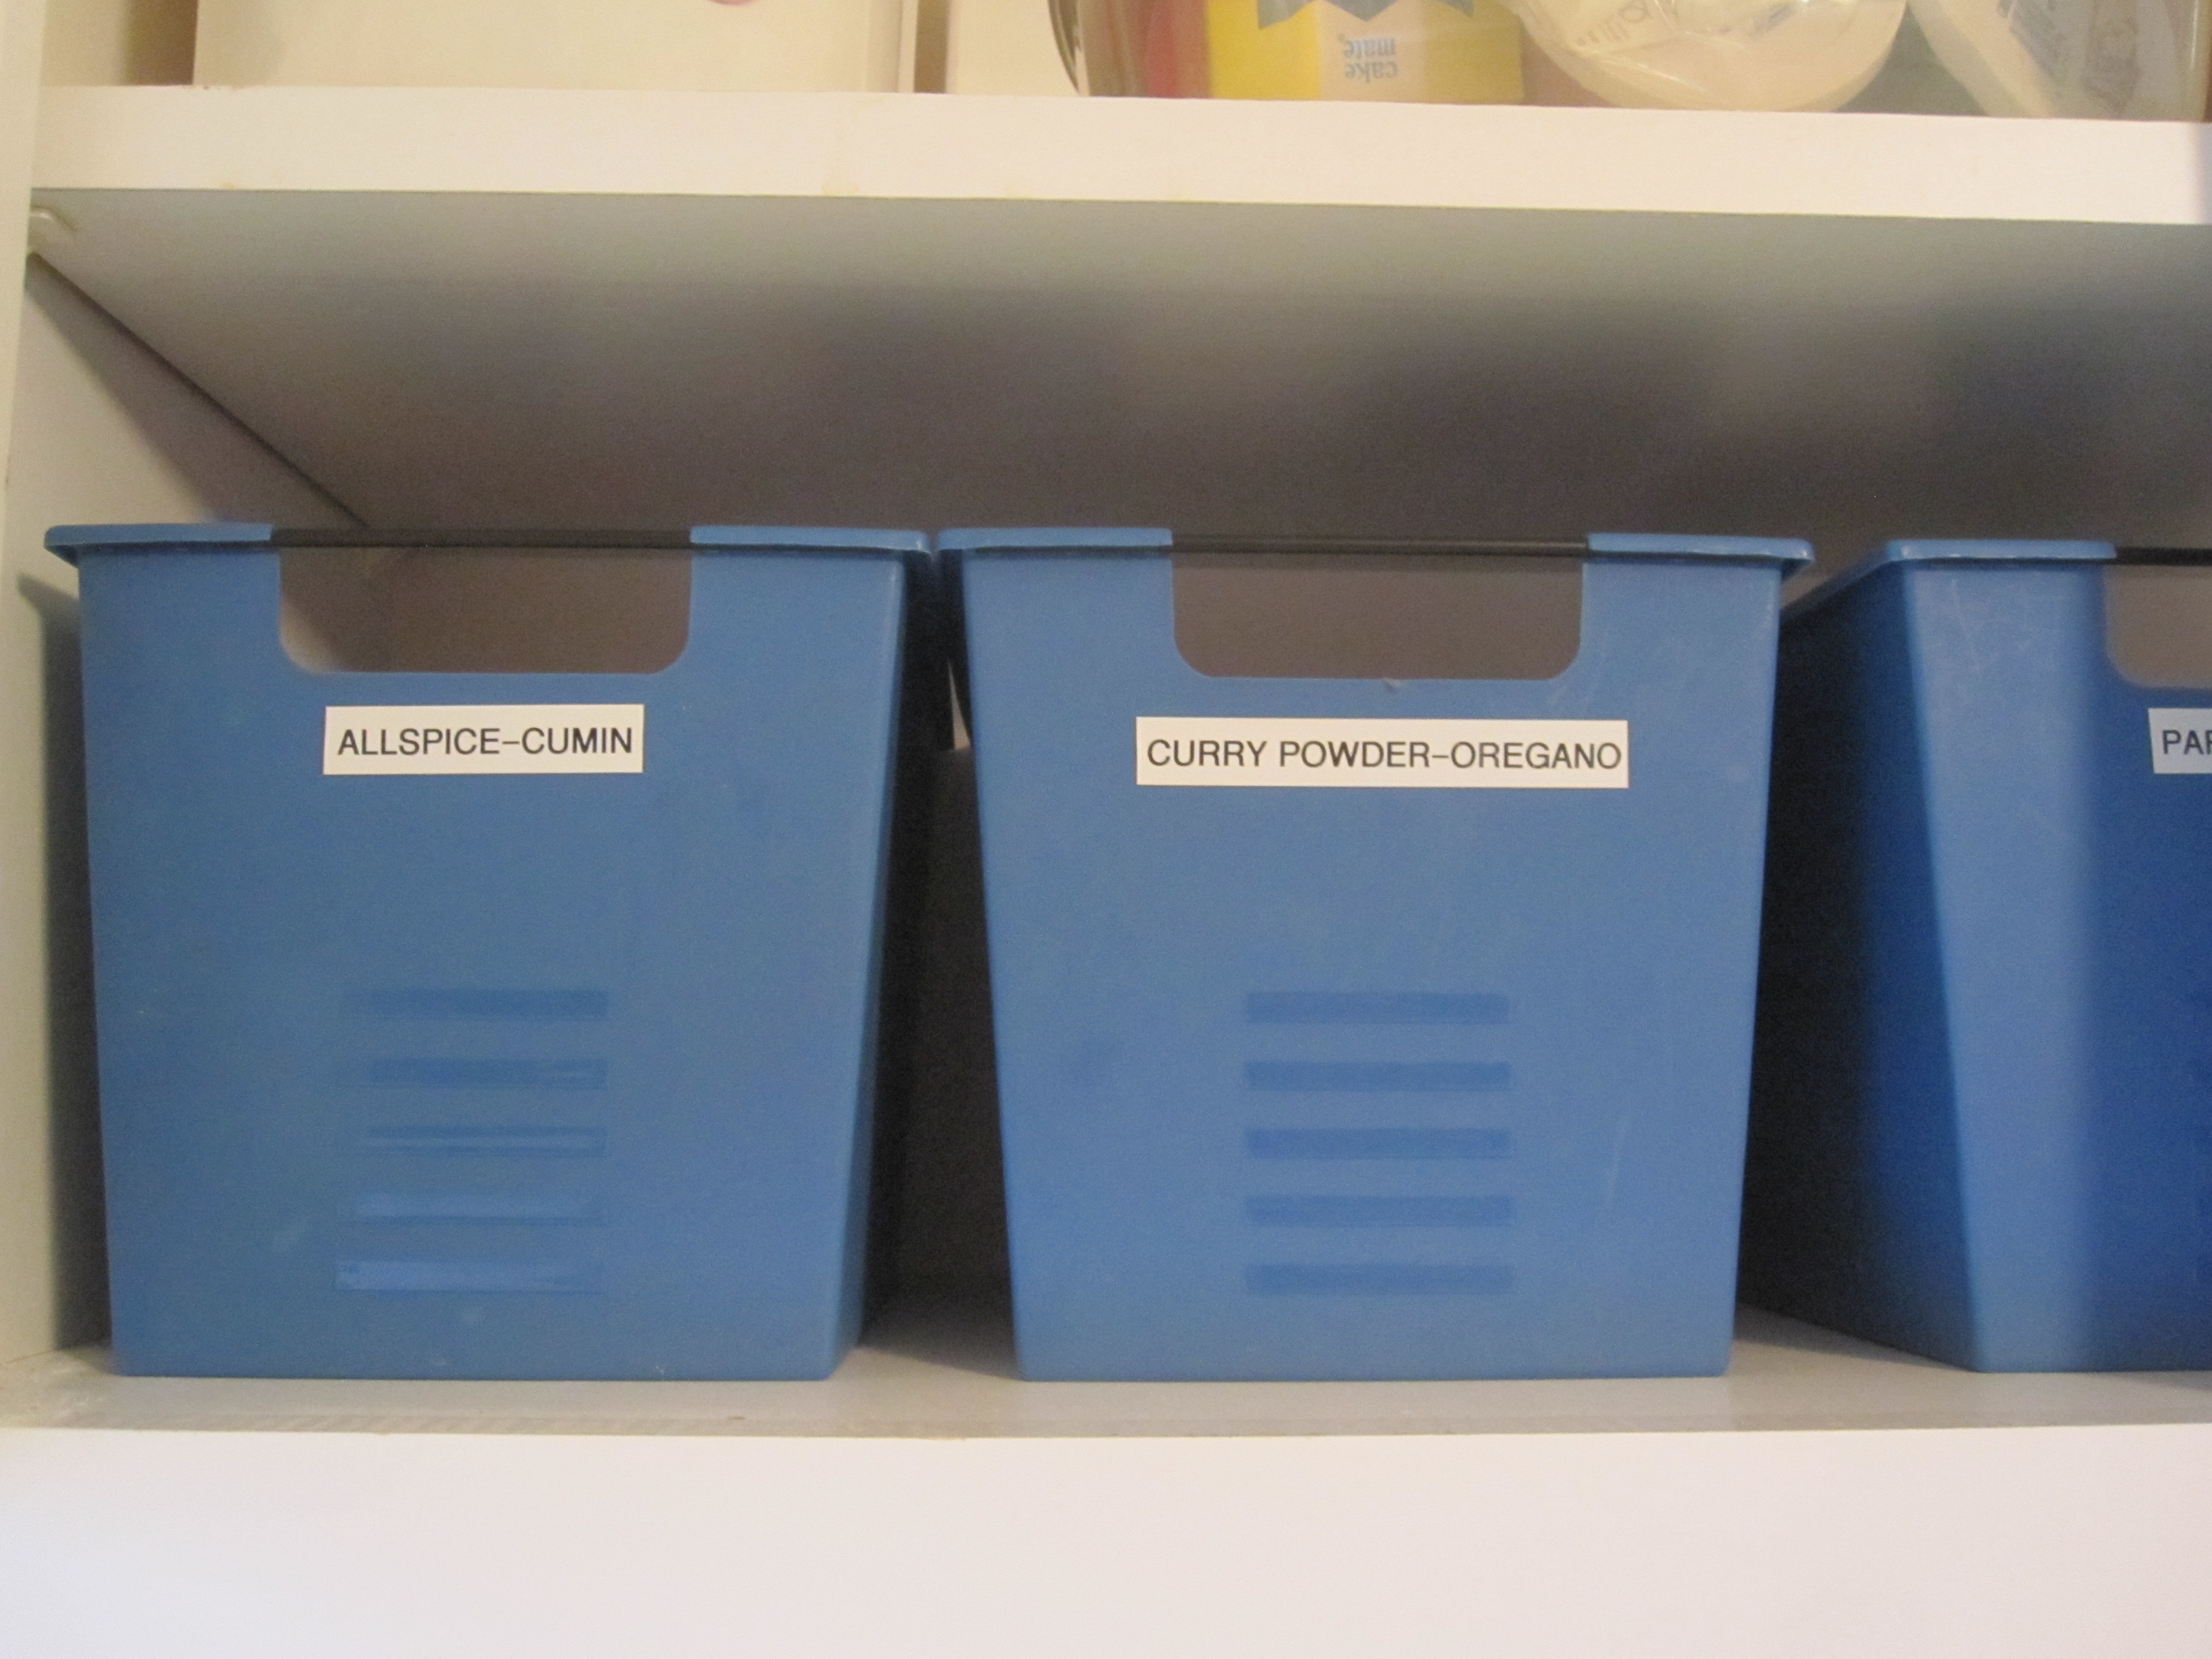 I bought several bins and broke down my most commonly used spices into four sections of the alphabet to label the bins. The best part is, these bins weren’t designed to be spice containers at all. They were designed to be locker bins for high school students. I found them on clearance for $1 each after the back-to-school season years ago.

I love that these bins are easy to clean and I can tell at a glance if I am out of something. All I have do is label the tops of the bottles and toss them in their bins, although nowadays, many bottles already come labeled.

Kitchen Design
While we’re on the subject, and this was one of my points of inspiration for this post, there are a lot of custom cabinetry option returning to popularity again in new kitchens. Cooking fans have some beautiful and creative solution options that those spice merchants of old would be envious of…
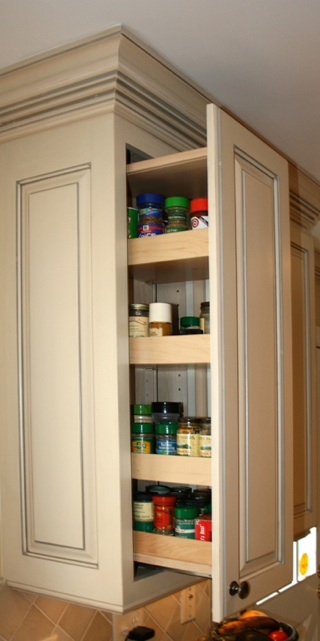
Image courtesy of woatile.com
FYI: All of our cooking oils and vinegars like a cool, dark place for storage, too. They last longer and keep from going rancid it you store them with the same care that you store your spices.
I am a big fan of this design of built-in spice storage:
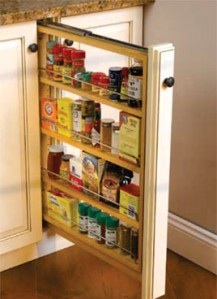
Image courtesy of thecabinetfactory.com
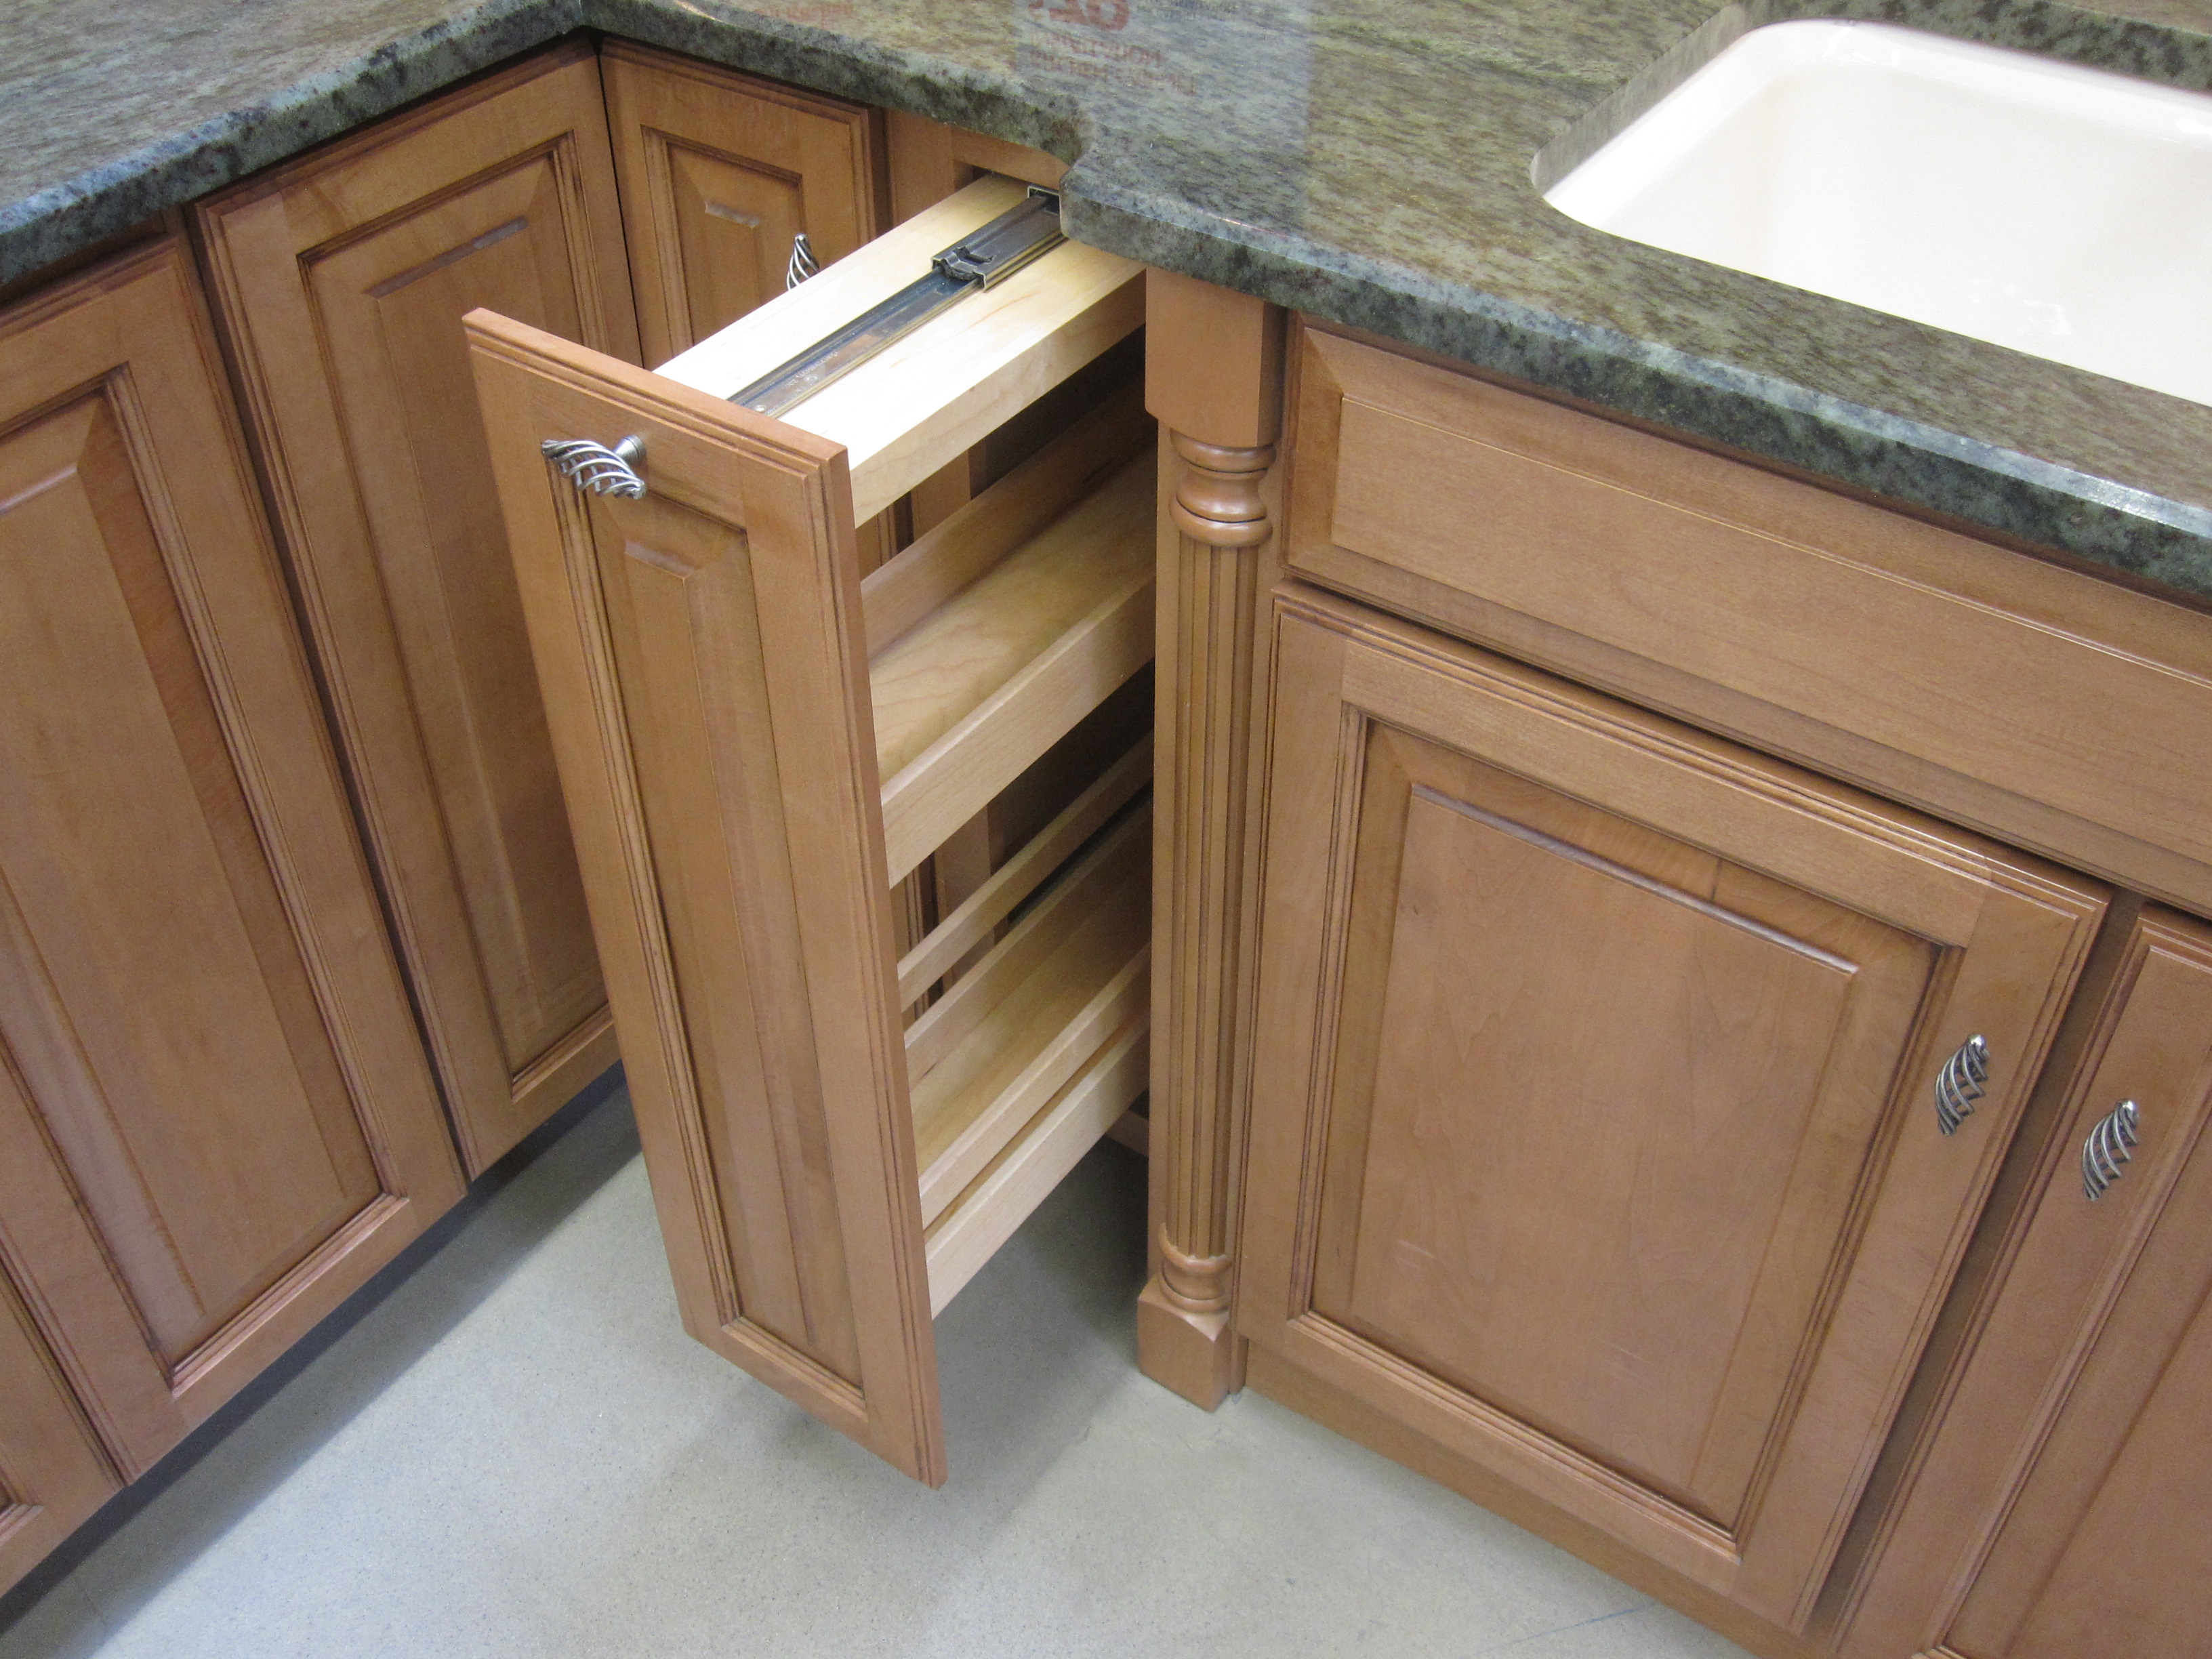
But whatever you may choose to do with a built-in spice rack, DON’T do this:
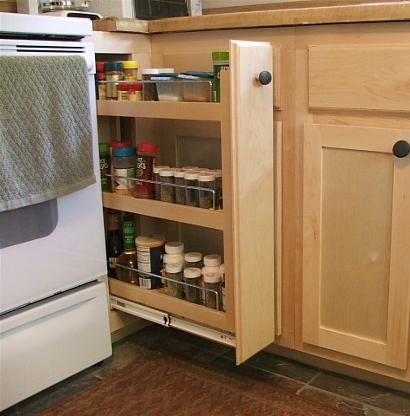
Image courtesy of jtphomeservice.com
Right by the oven?! Heat!!!!
Also, avoid putting a built-in spice rack by your dishwasher, which also generates a lot of heat on its side panels. Better to put your pretty and practical spice rack somewhere else in the cabinetry line up. Like this example I recently snapped in Home Depot:
 Now you see it, safe, dry and cool next to the sink…

…and now you don’t. Beautiful, practical and functional.
Have you ever thought about how you store spices in your kitchen? How many bottles of spice do you use regularly use in your home? (Just guesstimate.) Do you cringe, like I do, when you have to throw away a wasted spice? Anyone out there have a creative way to store spices in their pantry? Share your spicy-ness in a comment!
Freezer feasts
This is a recipe post. And it isn’t.
There are no food ingredients specified in this post, but it is a recipe for saving money and improving your health. It can also help you organize your kitchen to be more functional at mealtimes. Whether you live alone, have roommates, a spouse or even a large family, this post can help you improve your meals.
It starts here:
Tools
We’re at the grocery store, picking up the three, very affordable tools we need for this project. They are:

Generic grocery-store-brand plastic food storage tubs in a small size. Generic is always better because they are easy to replace as needed at the least amount of cost. Look for good sales, like you see in the picture above, and stock up on them. (Always recycle these responsibly when you need to buy new ones!)

Freezer-proof masking tape. It looks like regular masking tape but this tape’s adhesive is designed to stand up to cold temperatures. Most grocery stores have this if you look for it, as does Target and Wal-mart. One roll will last you a long time.

A fine-tip black Sharpie or other permanent marker. This works great on the freezer tape and is easy to write with and read clearly later.
Have you figured out what we are doing with these items? We are our upgrading “leftovers” to the 21st century. They must be practical to store, easy to create and enjoyable to use. Based on conversations I’ve had with clients, many people have not been taught how to manage leftovers to work for them. This is my method and it has saved us THOUSANDS of dollars every year.
“Leftovers”
The most important thing strategy for using leftovers well is your attitude. It is easy to thing of them as “leftover food”. It is a meal that you are repeating, but have little surprise to look forward to regarding how it will taste.
Here’s how you change that: think of leftovers as “leftover money”. According to MSN.com:
$9 will generally cover a decent lunch most workdays. If you buy, rather than pack, a lunch five days a week for one year, you shell out about $2,340 a year.”
Let me just reiterate that for you: $2, 340 A YEAR!
Would you mind having another serving of last week’s casserole if it meant that you would use one day’s worth of your ” leftover lunch money” to see a movie this weekend? What larger purchase could you afford faster if you were willing to put some daily “leftover money” toward it? How much could you build your savings? This is a tried-and-true method of saving money.

Image courtesy of wikipedia.com
Assembly
We only have two people in our household, but we never cook for quantities less than 4 servings. This mean automatic leftovers get created with no additional planning required from us.
Here are my tools:
 We use the “snack size” containers for our leftovers, for several reasons. We never waste a small part of a meal in the back of the fridge because we forgot to use it up. Snack-sized tubs help our leftovers go farther. More leftovers mean less work later and bigger savings now.
This size also gives us automatic portion control, which is a real health concern in most American restaurants and homes. We supplement the small portions of our leftover lunches with one or two servings of fresh fruits or vegetables. For example, Mr. CARO will take one of these tubs and some carrot sticks for lunch and an apple for a later snack in his workday.
Here is an example of how we do this in our home. In the picture below, you can see some leftover rice and cranberry pilaf. I have also cut up and mixed in the leftover herbed chicken breasts to make re-heating the meal easy.

This one pot of leftovers yielded 5 yummy freezer feasts to be used for lunches days or weeks later.

All we have to do is label these tubbies using the freezer tape and fine-tip Sharpie. Each tubbie gets the name of the dish and the date it was put in the freezer.

Just a side note: We NEVER re-heat these freezer feasts in their plastic tubs. We always pop the frozen meals out of the plastic ware and heat them in a microwave-safe dish. This way we avoid risking any unhealthy heated-plastic toxins becoming part of our meal.
Supplementing
We also supplement our automatic leftovers. Once or twice a month, we make one easy and/or favorite meal for direct storage in the freezer. Pictured below is 1 pound of beef mixed with 1 pound of fusilli pasta, leftover homemade marinara sauce and some grated Parmesan cheese. The dish only took about 20 minutes to make and made 8 lunches.

Storage
All of these feasts stack nicely in our freezer. This is another reason to always buy square shaped food tubs, so you maximize your freezer space and your freezer’s energy efficiency.

We fill a whole shelf of our freezer with these feasts and every day we can choose exactly what we are in the mood to eat. All these feast are ready to go at a moment’s notice, which makes it that much more easy to get out of the door in the morning or make an easy dinner after a long day of work.

Do you use your leftovers effectively as later meals? A little organization goes a long way! What is the yummiest dish you would like to have as “leftovers”? Do you have a “freezer feast” that makes your co-workers hungry when you re-heat it for lunch? Leave a comment and dish!
Hint Hint: There is a free giveaway related to this very post coming later this week! You don’t want to miss it so be sure to check back and enter to win!